Add subscription
On our website, you can compare the range of features in our three MailPro services.
Please note that a MailPro subscription can only be used for one domain. If you would like to use MailPro for multiple domains of your hosting package, at least one MailPro subscription must exist for each domain.
Email addresses for a domain can then be operated either with the usual mail services from Hoststar, or with MailPro. Hybrid operations of the two services on a single domain is not possible.
To add a MailPro subscription, follow these steps:
2. Selection
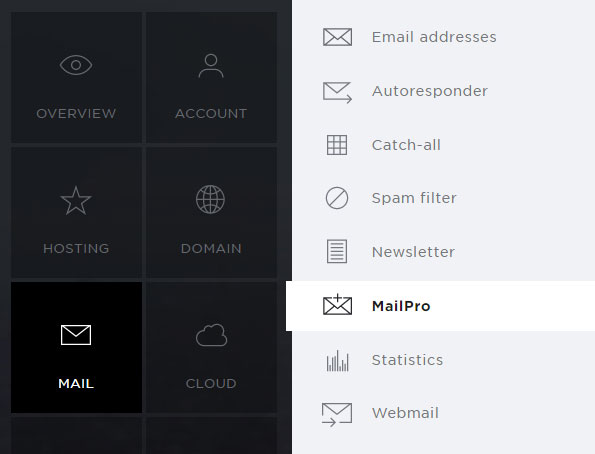
Select the Mail → MailPro menu item.
3. Select subscription and domain
Select your subscription and the domain for which you would like to add a MailPro subscription.
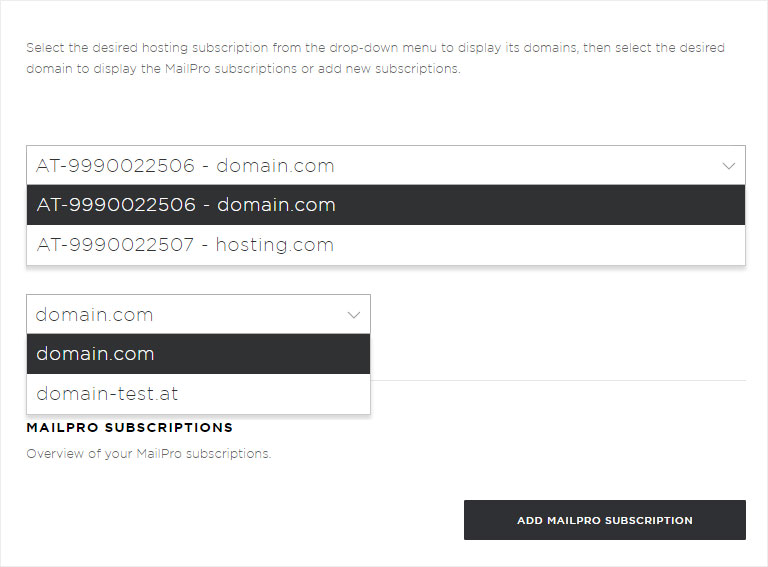
4. Add MailPro subscription
Now click on the Add MailPro subscription button, which will launch a pop-up.
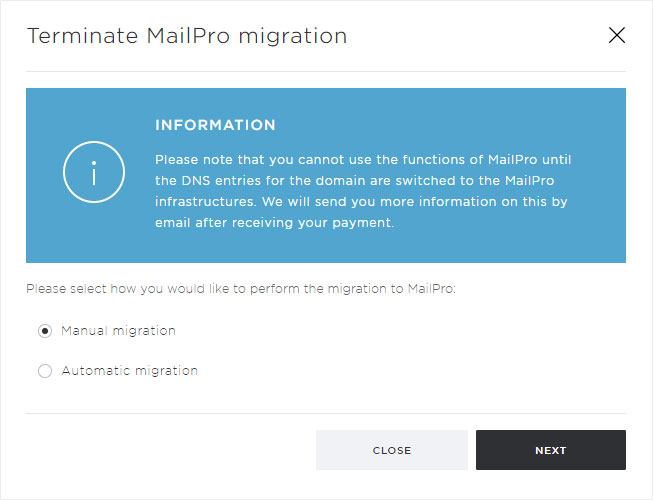
Here you can choose whether you want to manually change the DNS records for the domain later on, or if they should be automatically changed at a certain point on the MailPro infrastructures.
Then click Next.
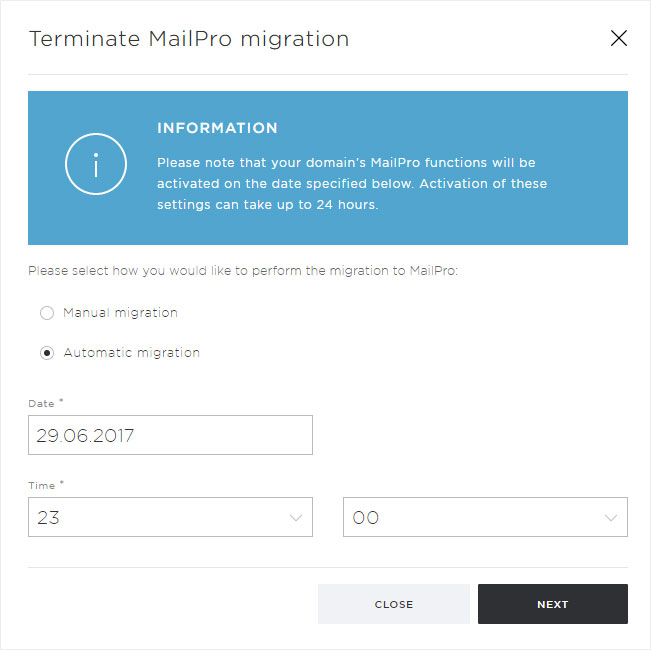
Automatic migration
If you have chosen Automatic migration, existing email addresses can be automatically migrated to MailPro.
You can now set a time and date for the migration of DNS records to the MailPro infrastructure. At this point, the MX records for the relevant domain will be changed on the MailPro server. After this point, no more emails can be received by the email inboxes created under Mail.
Then click Next.
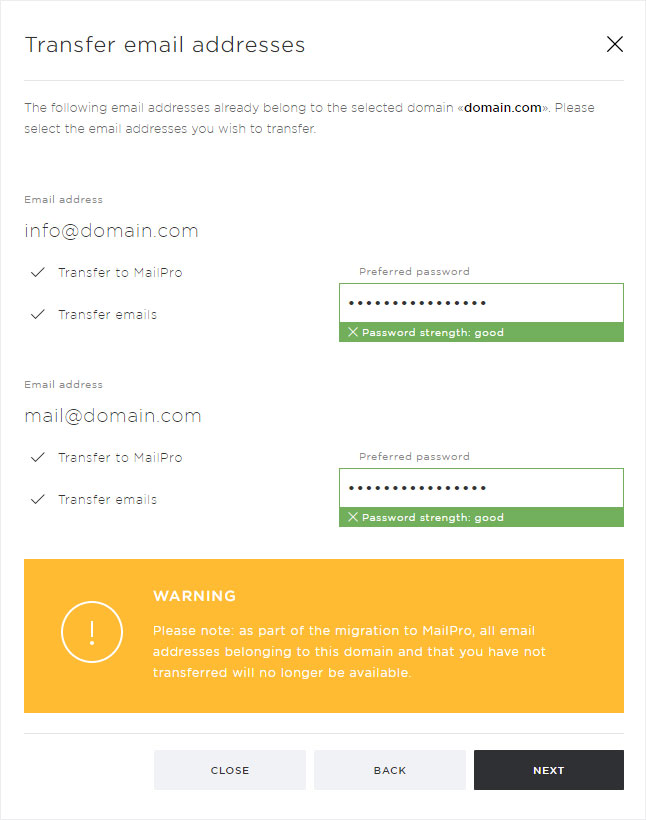
5. Adopt existing email addresses
You now have the option of automatically migrating existing email addresses created under Mail to MailPro.
For each existing email address, you have the option of simply having the same email address created automatically or to also have the emails for that address migrated as well (data transfer). If you have selected Transfer to MailPro, you can define an associated password.
Then click Next.
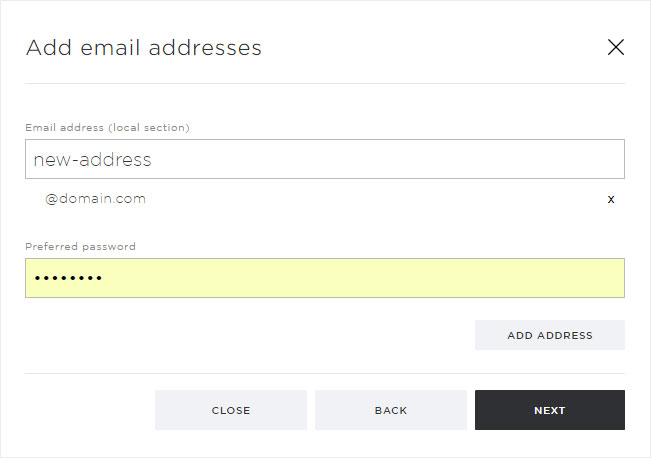
6. Add new email address
Along with the transfer of existing email addresses to MailPro, you have the option of creating new email addresses for MailPro.
You can create them at this point or at a later stage.
Then click Next.
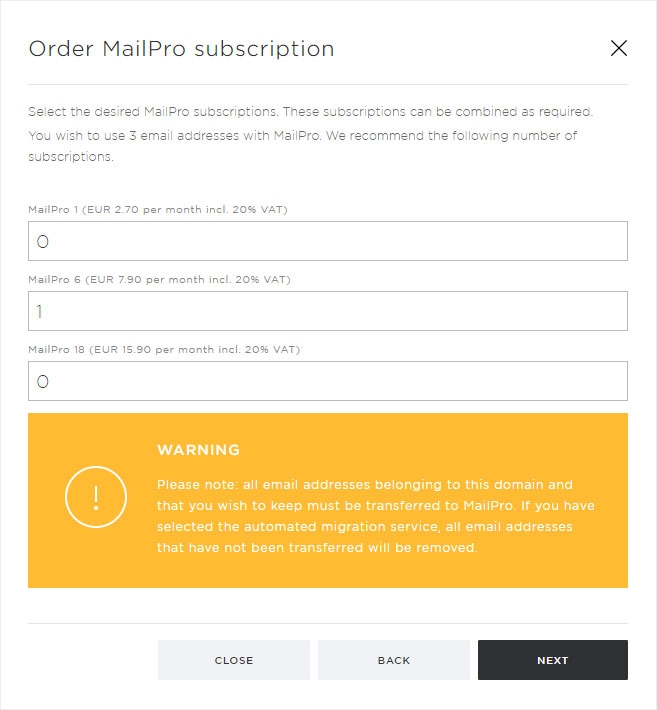
7. Order MailPro subscription
Choose the number of MailPro subscriptions you wish to use for the selected domain. The optimal MailPro subscription will be recommended based on the number of transferred and newly created email addresses.
You can find the range of services for each subscription on our website.
Then click Next.
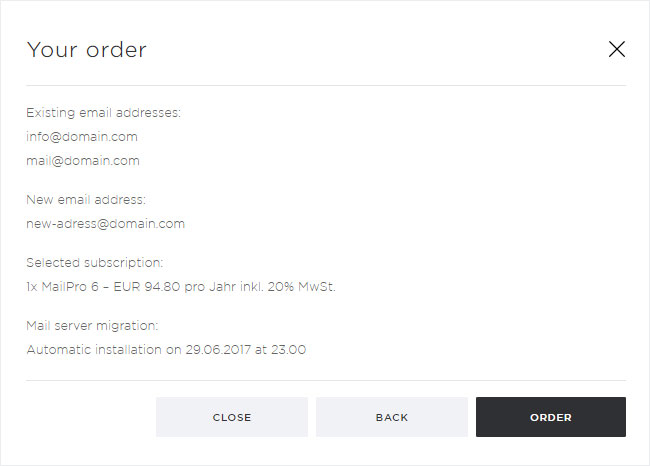
8. Summary of your MailPro order
You will now see a summary of the MailPro services you have chosen along with the annual subscription costs.
If you agree with the selection and the mode of migration and wish to send the order, click on Order.
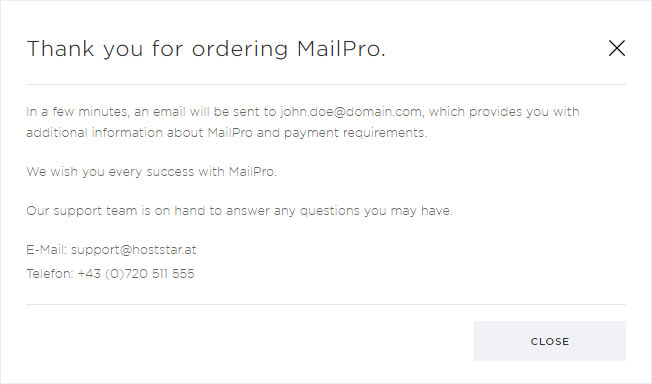
9. Order confirmation
In the pop-up window that now appears, you will see a confirmation of your MailPro order.
You will also receive an invoice for your MailPro subscription by email. Alternatively, you can choose to display the invoice for the selected MailPro subscription, as described here.
Close the pop-up window by clicking on the Close button.