Setting up the FileZilla FTP client
To set up an FTP client, you must first download the installation file (here, for example, FileZilla). You can also download any other FTP client.
If you have chosen to use FileZilla, follow the steps below to set up the software:
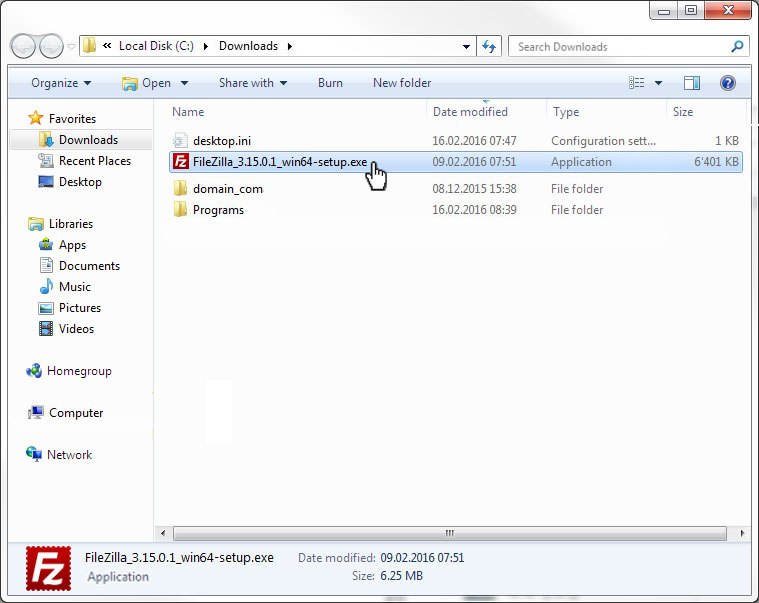
1. Start installation
After you have downloaded FileZilla, launch the .exe file by double-clicking the file name or program icon.
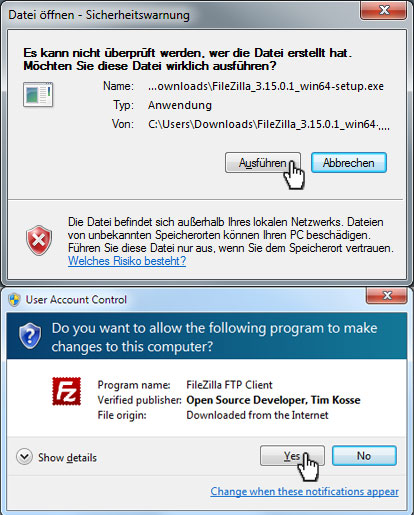
2. Security warning
Depending on the operating system settings and version, one or both of the following security warnings may appear. Click Run or Yes to close them.
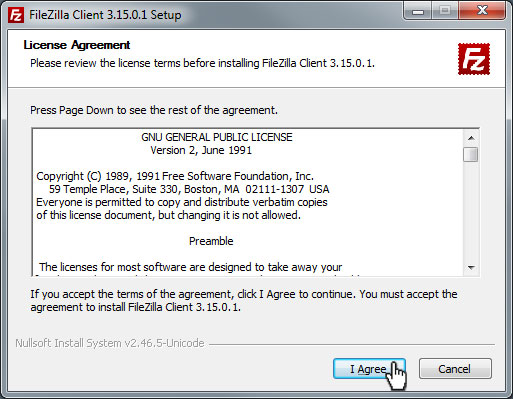
3. Licence agreement
The first time you launch the program, you will see a licence agreement which you must agree to in order to proceed with the installation. Read it carefully and then click on I Agree.
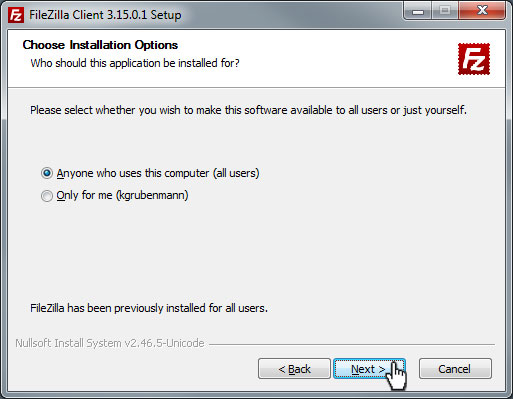
4. Choose installation options
The next step is to decide whether you want to install FileZilla for you or all other users of this device. Note that the All users installation option requires administrator rights.
Then click Next.
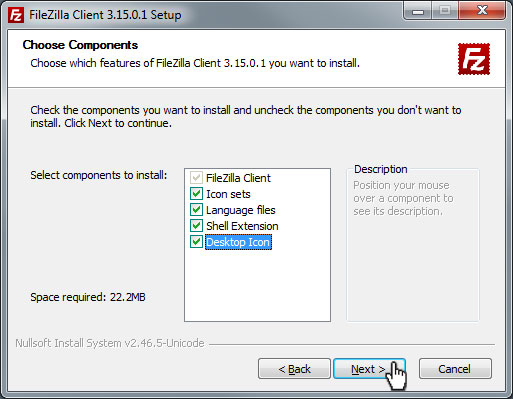
5. Choose components
To ensure that the installation runs smoothly, we recommend using the same component configuration as shown in the picture. It is up to you whether or not to add an icon to the desktop.
Then click Next.
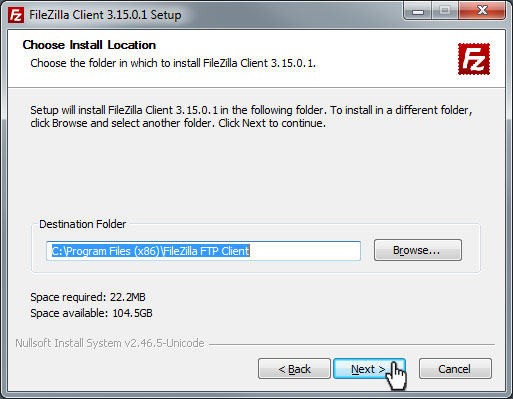
6. Choose installation location
You can select the installation path of the program to fit your needs in the following input screen. Then click Next.
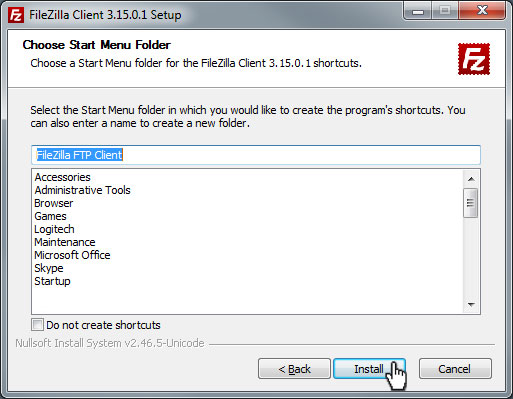
7. Start Menu folder
Here you name or select the folder that will contain the shortcut to FileZilla. The default name FileZilla FTP Client is fine for most users. You can also select the Do not create shortcuts option if you do not want to create a shortcut in the Start menu.
Then click Install.
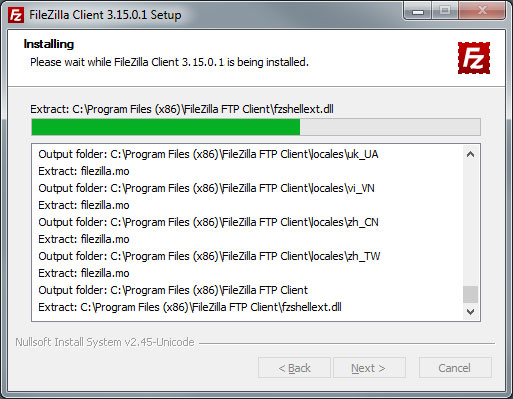
8. Installing
FileZilla will now be installed. This will take a moment.
9. Completing setup
Once you have completed the installation, click Finish to complete the installation process and launch FileZilla directly.

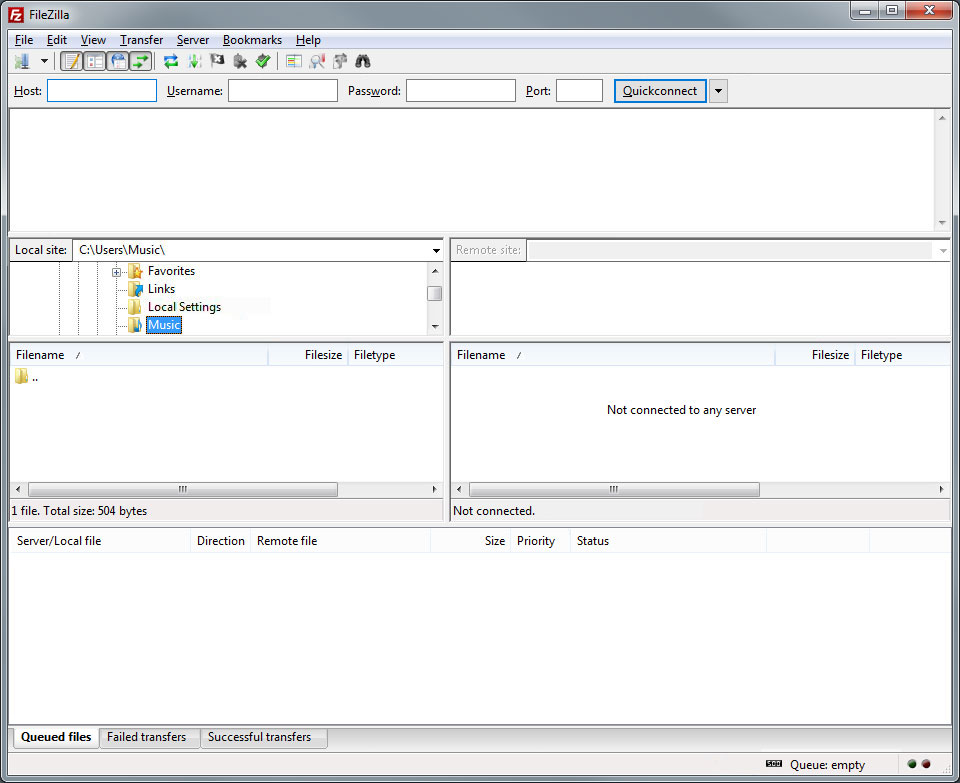
10. FileZilla settings
You will now see the FileZilla interface and can perform the following actions: