Adjust PHP.ini settings
The PHP.ini file is a configuration file for the PHP application and this is read in when a page is started. If you have the appropriate knowledge, you can set or adapt this PHP.ini according to your needs.
Proceed as follows:
2. Navigate
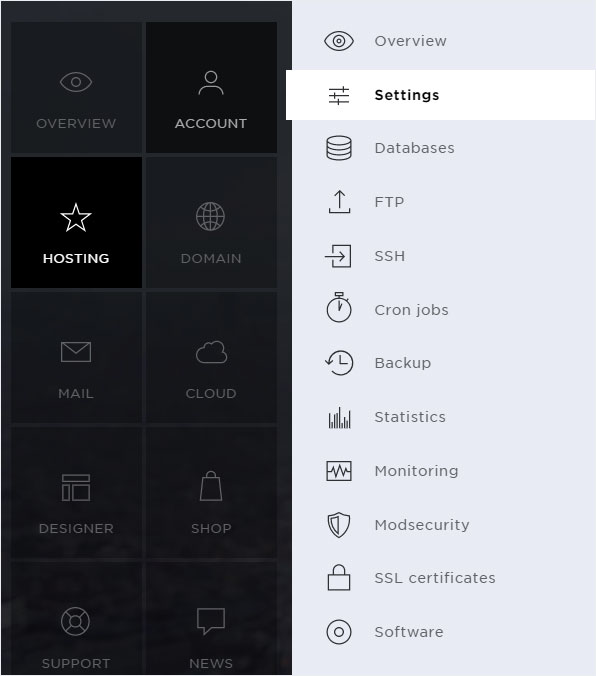
Click the Hosting menu item and then Settings.
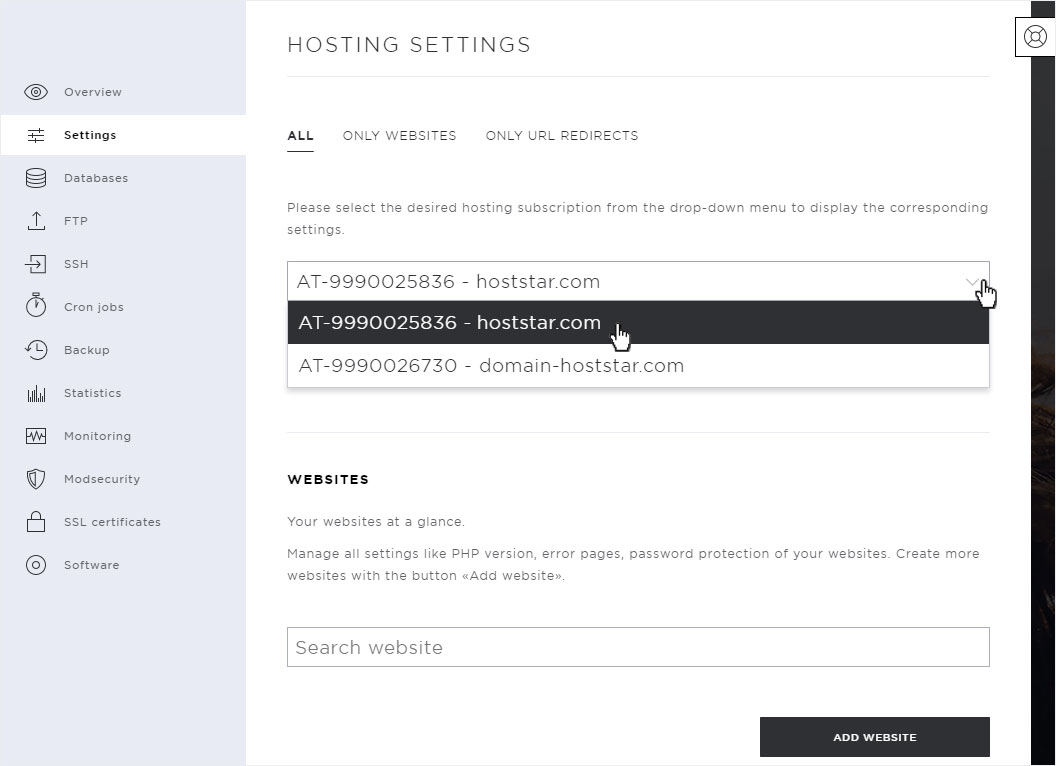
3. Select hosting
If you have different hosting packages with us, you must select the correct hosting in the selection box at the top.
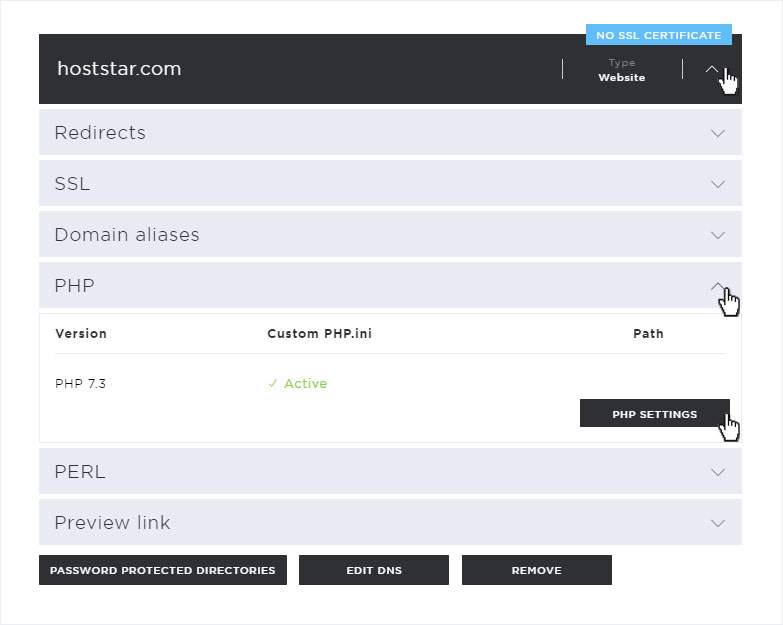
4. Edit PHP
At the desired website for which you want to change the PHP version, click on the arrow symbol on the right, then on PHP and after on the button PHP settings.
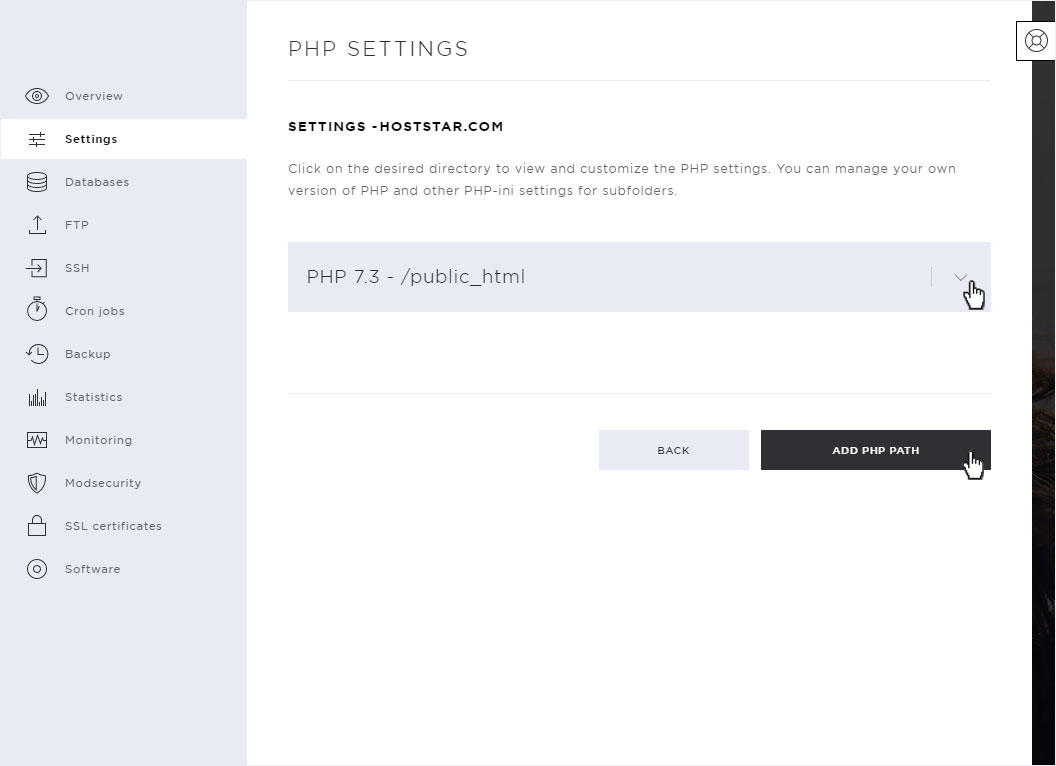
5. PHP settings
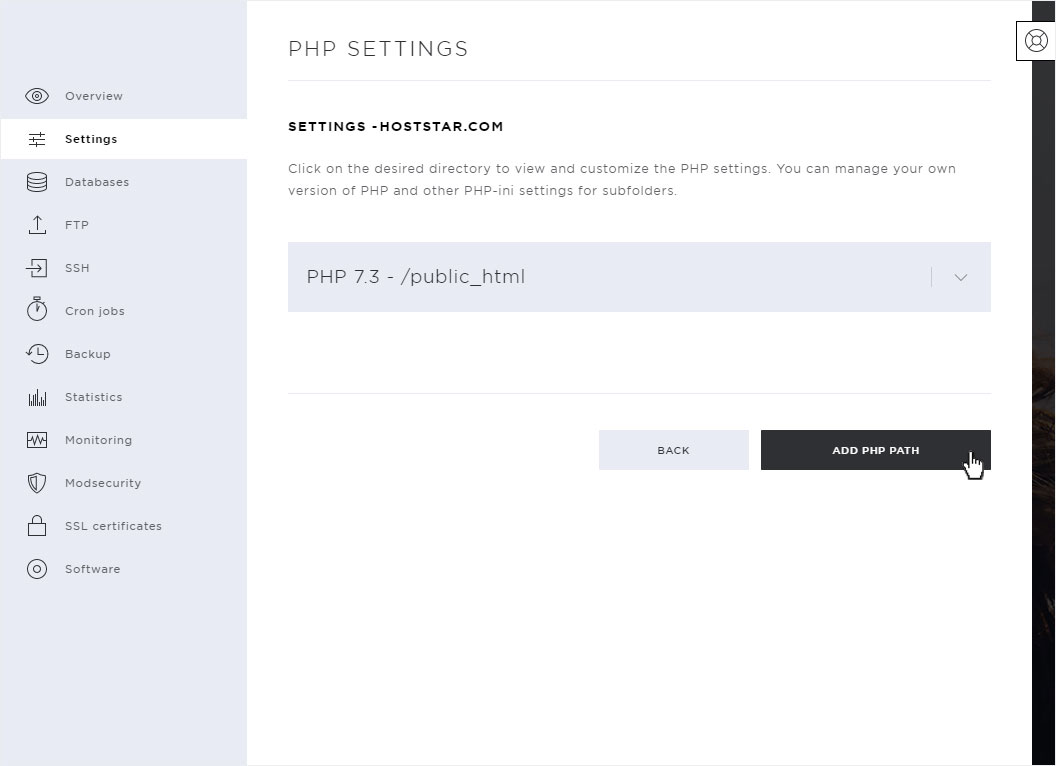
Here you can now choose for which directory you want to change the PHP.ini settings. By default your website is located in the directory /public_html.
- On the one hand you can choose to change the PHP.ini settings for the directory /public_html
- or you just want to adjust the PHP.ini settings for a new subfolder, then select Add PHP path.
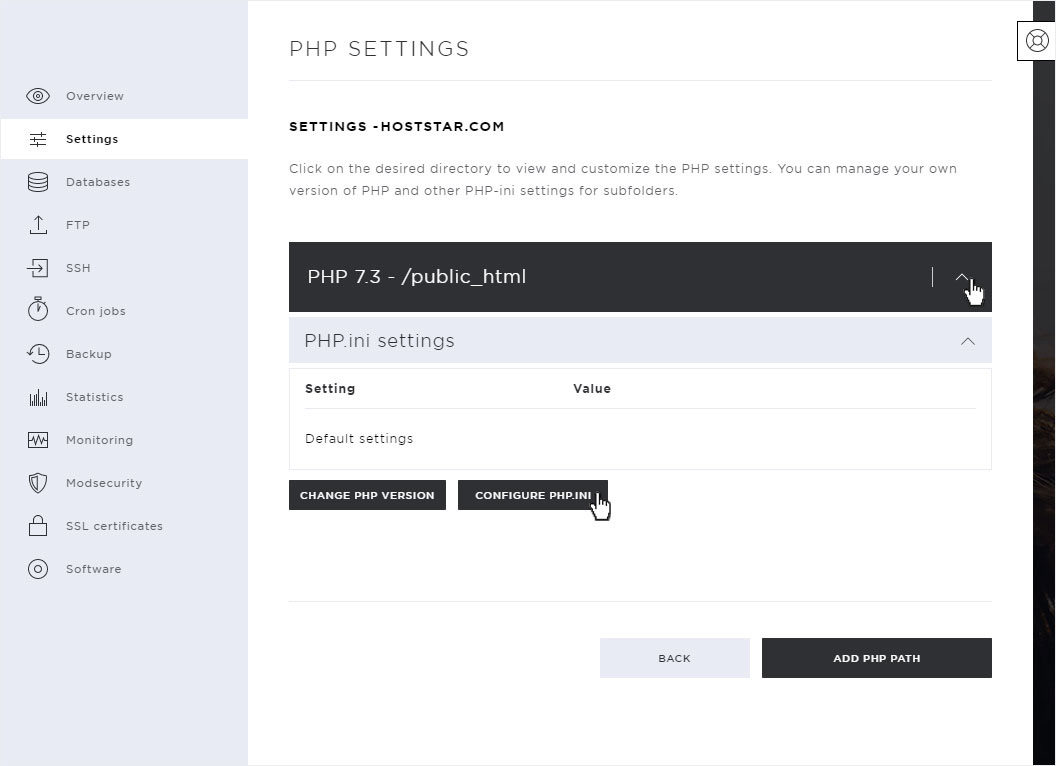
5.1 PHP.ini for public_html
By default your website is located in the directory /public_html. If you want to change the PHP.ini settings for this directory, please click on the arrow symbol on the right and then on the button Configure PHP.ini below the information.
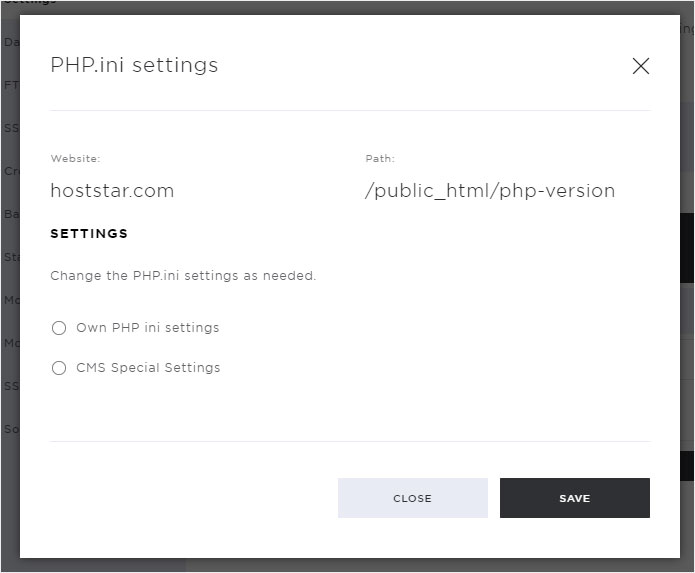
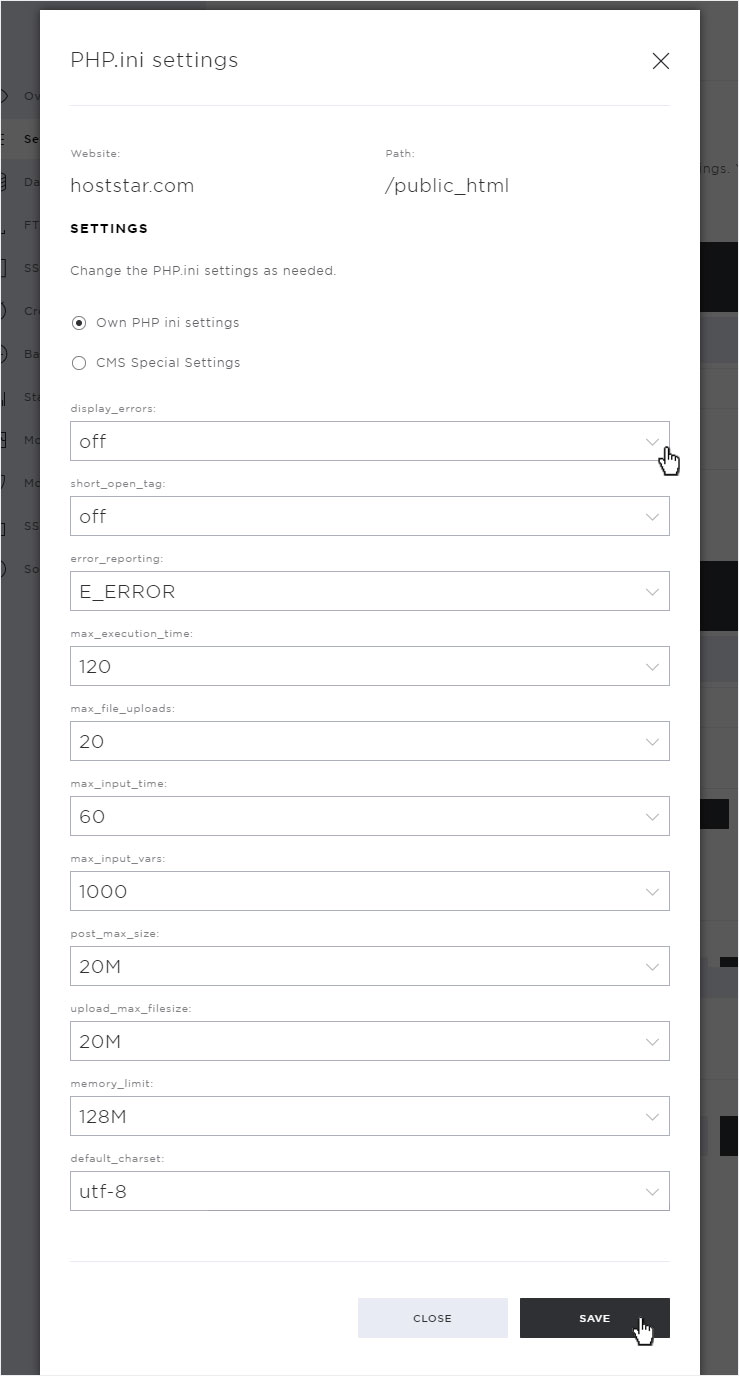
5.1.1 Custom PHP.ini settings
If you want to make your own PHP.ini settings, select the item Custom PHP.ini settings.
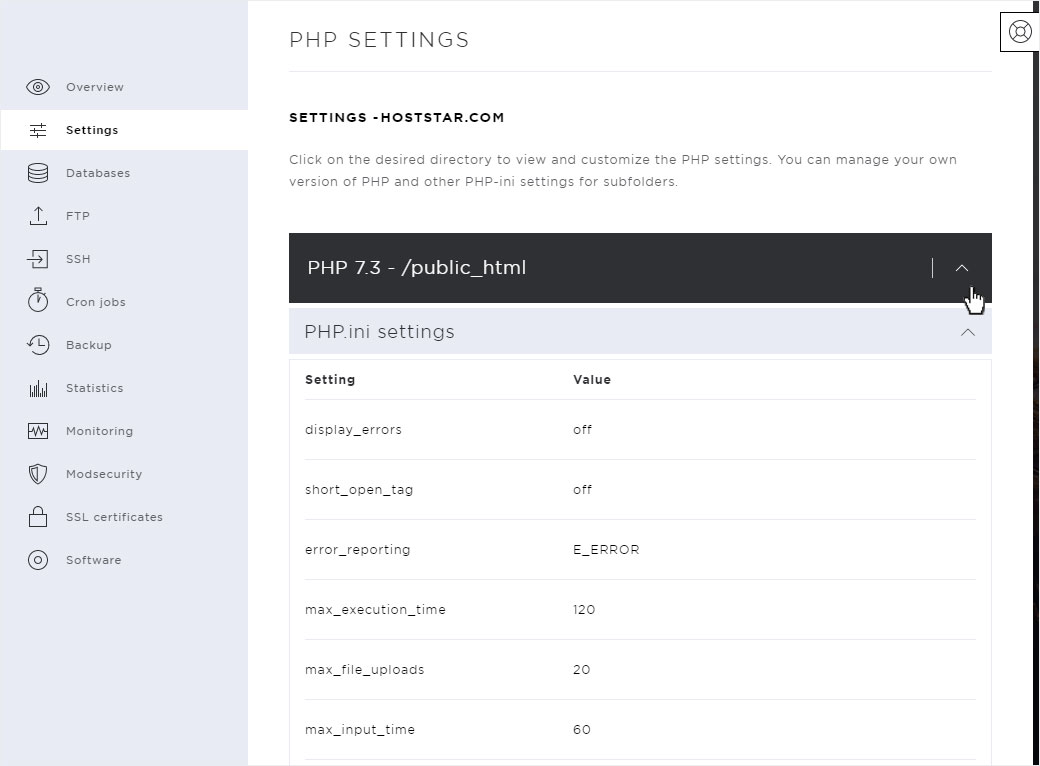
You will immediately be shown below the corresponding options you have when designing the PHP.ini file. Currently the following settings can be set:
- display_errors: Enabled, PHP errors are displayed on your website
- short_open_tag: Enabled, PHP scripts may also start with <? otherwise they must start with <?php
- error_reporting: Determines what kind of errors are displayed on the web page when display_errors is enabled
- max_execution_time: Maximum time in seconds a script may run before the parser stops execution
- max_file_uploads: Determines how many files can be passed to PHP for processing at a time
- max_input_time: Maximum time in seconds that a script may spend processing input data (such as POST, GET and file uploads)
- max_input_vars: Maximum number of variables handled by PHP in a process
- post_max_size: Maximum size of a POST query that can be passed to PHP
- upload_max_filesize: Maximum size of a file, which may be given to PHP
- memory_limit: Maximum amount of RAM memory a PHP process may use
- default_charset: Sets the default character set PHP uses to process files and queries
More information about the settings in the php.ini file can be found on the official PHP website.
Now adjust the settings according to your wishes and then click on Save.
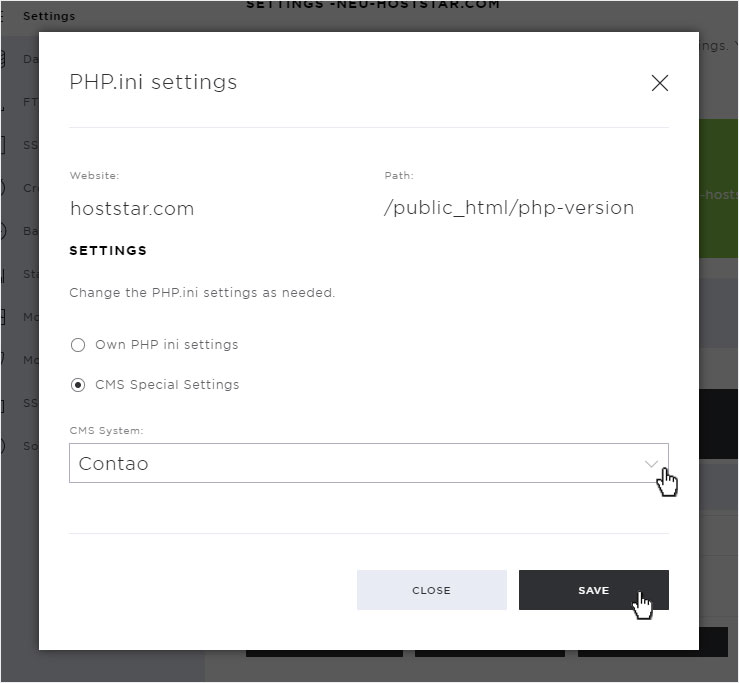
5.1.2 CMS Special Settings
Some CMS installations like Contao require various specific settings in the PHP.ini file. To simplify the settings for this, you have the possibility to set CMS-specific settings.
Currently, the only option is to set the special settings for Contao. We will add more CMS packages to the list bit by bit.
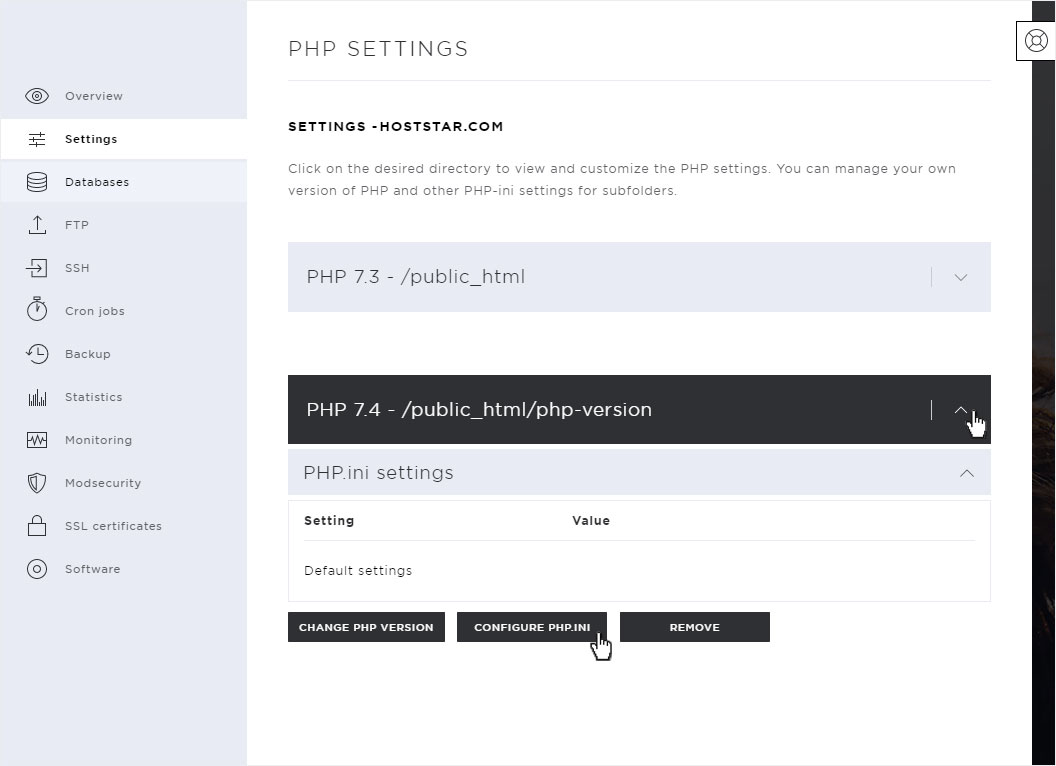
5.2 PHP.ini for new path
If you want to adjust the PHP.ini settings for a subfolder only, please click on the Add PHP path und folgen Sie dieser Instructions in section 5.2.
Afterwards you can continue according to this Instructions under point 5.1, simply open the directory just saved and click on the button Configure PHP.ini.
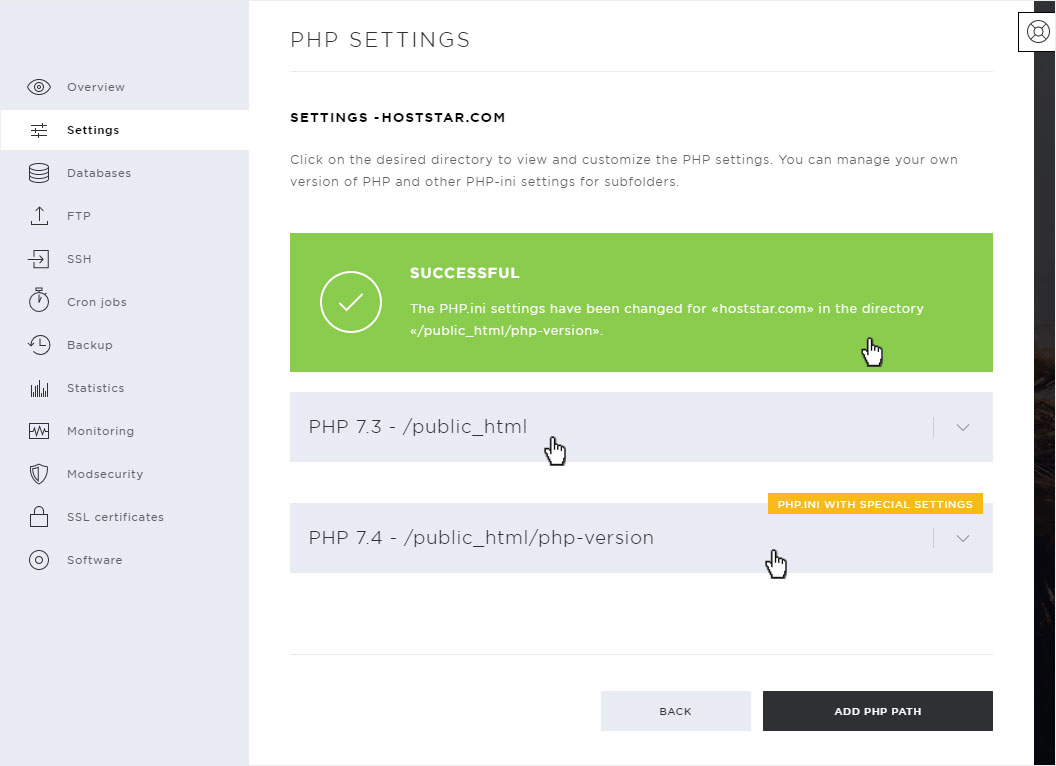
6. Successful
You will automatically be redirected to the settings overview page, the successful changes will be indicated with a green success message and the newly selected PHP versions will be active after a few seconds.
7. View - custom PHP.ini settings
Click again on the arrow symbol on the right (here in the example for the directory: public_html).
ThePHP.ini settings are displayed. Here are all the positions for the Customer PHP.ini settings.
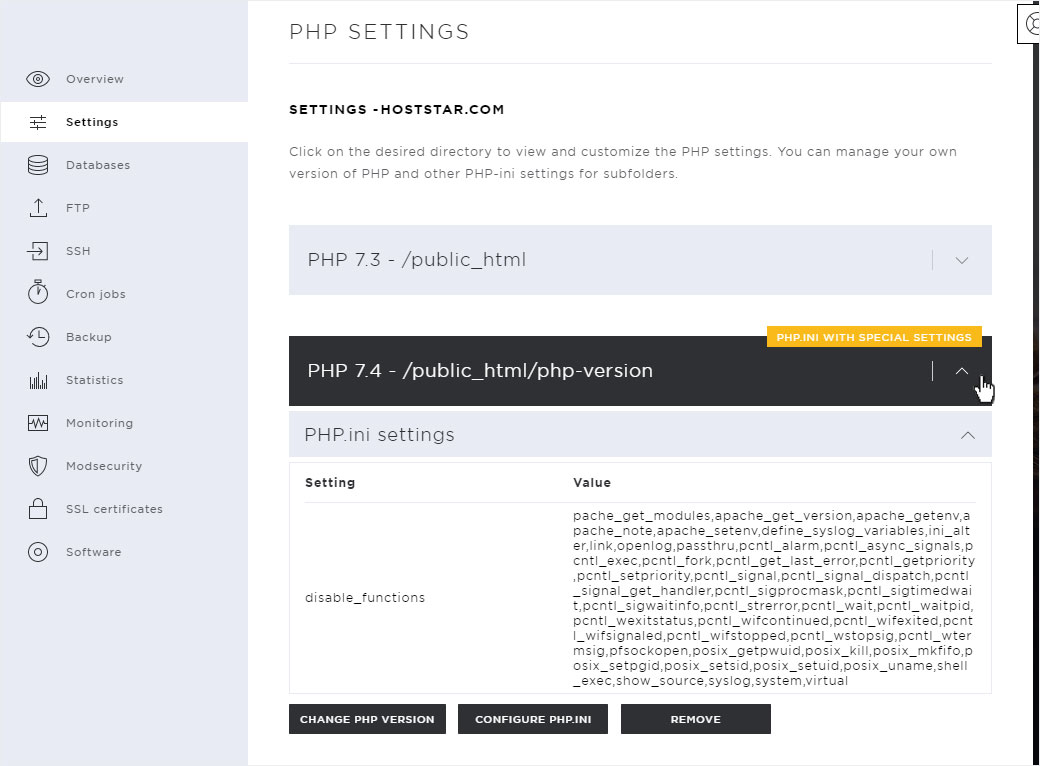
8. View - CMS Special Settings
Click again on the arrow symbol on the right (here in the example for the directory public_html/php-version, this one with special settings).
The PHP.ini settings are displayed. Here are all items concerning the CMS special settings.