Password-protected areas
If you want to password-protect certain areas (directories) in your hosting account, follow these steps:
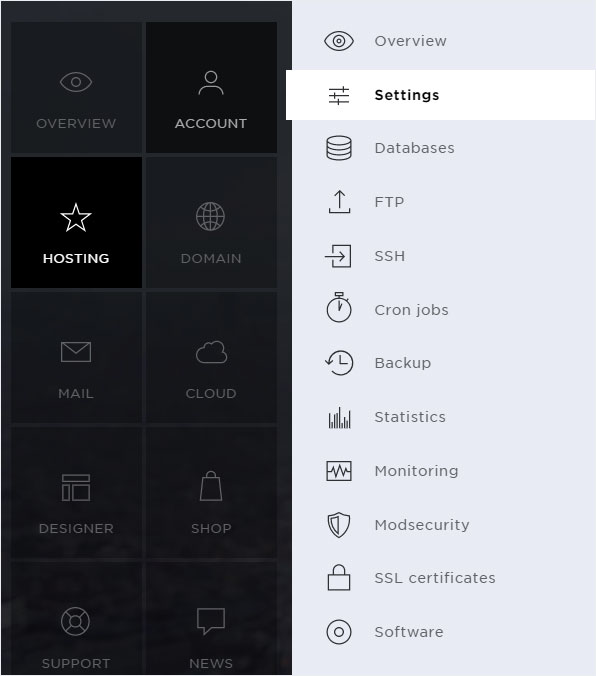
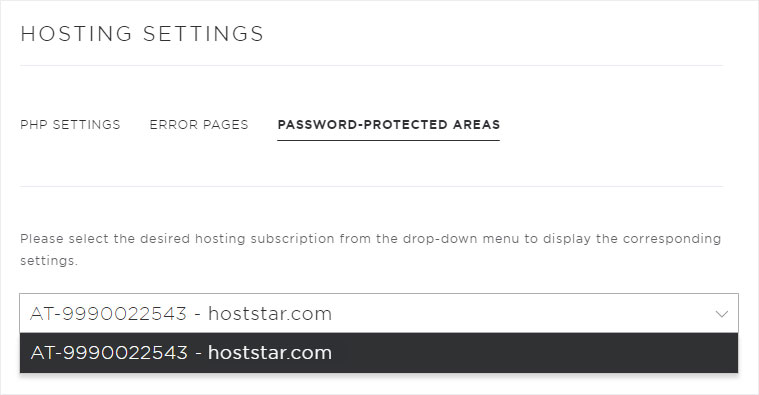
2. Navigate
Click the Hosting menu item and then Settings.
3. Click the password-protected areas
Click Password-protected areas at the top in the menu.
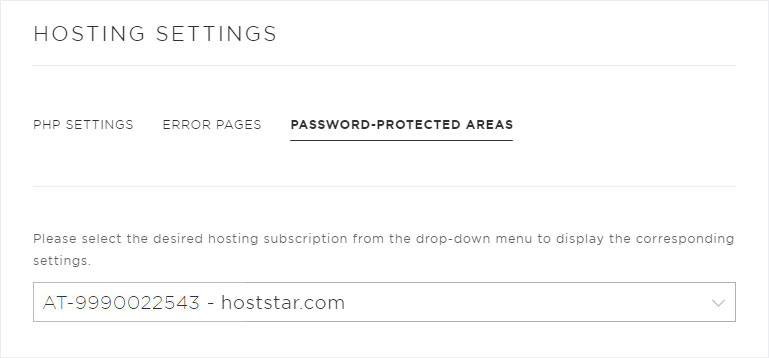
4. Select your subscription
Select the hosting package for which you want to add, change or remove a password-protected area.
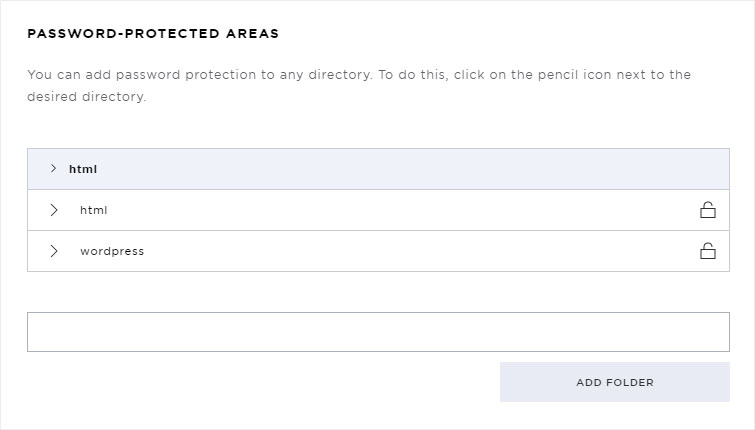
5. Create password-protected area (directory)
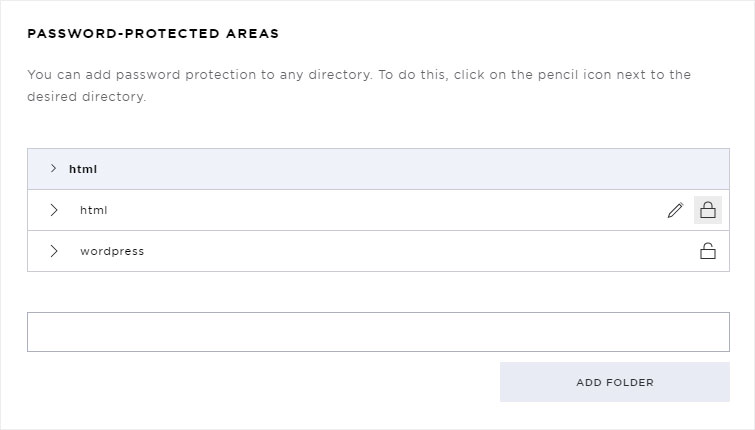
Click the lock icon next to the subdirectory to add password protection to subdirectory.
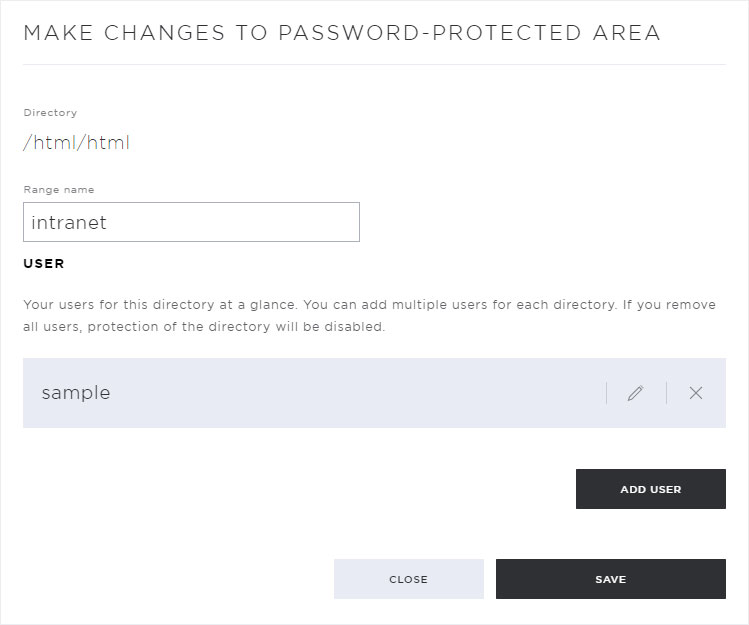
Now give the area a name (no special characters), a username (no special characters) and a password to activate password protection.
You can add additional users later.
Click the Save button to add password protection.

The password protection you have just set up is enabled instantly. Close the view by clicking the Close button.
You are returned to the overview where you see the password protection status of the directory (here, html) indicated by the pencil icon.

6. Change password-protected area (directory)
If you want to change the password protection for a subdirectory or add, change or remove a user, click the pencil icon next to the relevant subdirectory.
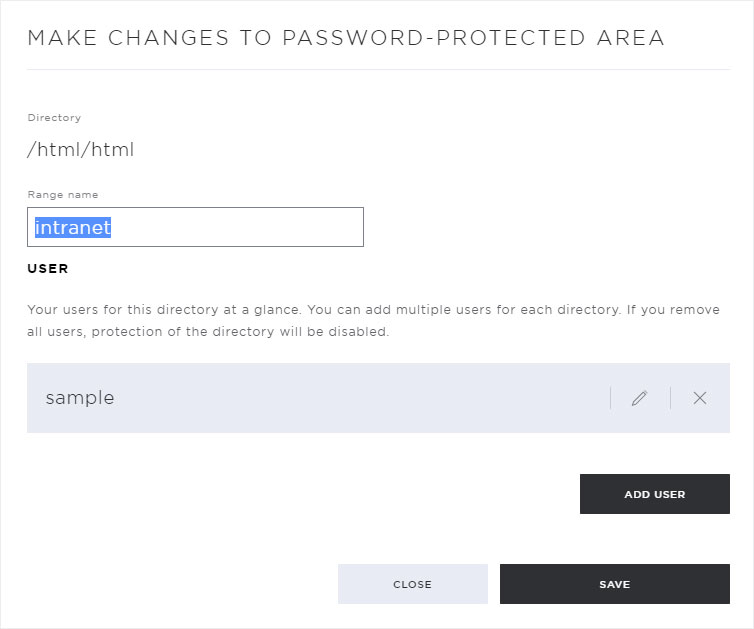
Changing the area name
Click the pencil icon next to the desired subdirectory, then enter the desired name for the protected area in the Range name box.
Next, click the Save button to apply your changes.
Changing the user
To change the username or password for an existing user, click the pencil icon next to the respective user.
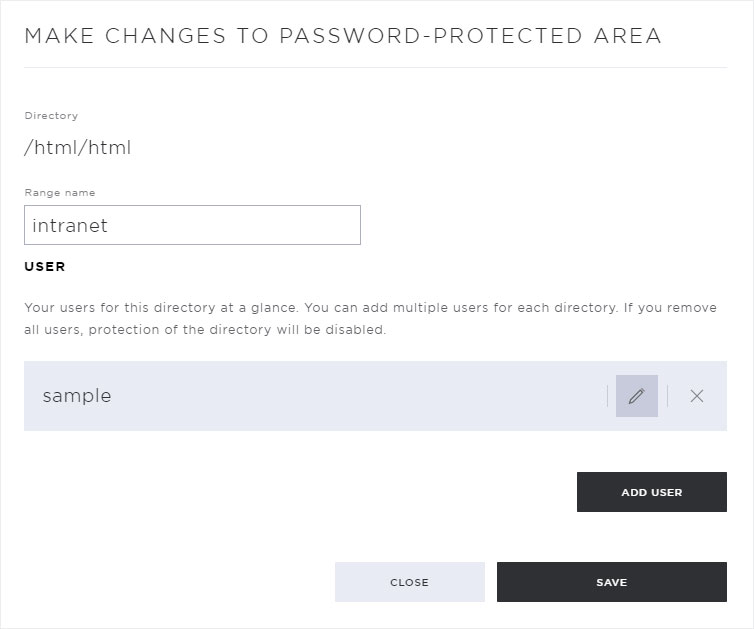
A pop-up window appears. Under User name, you can change the user’s name (no special characters) and password.
Next, click the Save button to apply your changes.

Add user
Click the Add user button to add a new user.
A pop-up window appears. Enter the user name and the desired password in the respective fields.
Then click the Save button to add the new user.
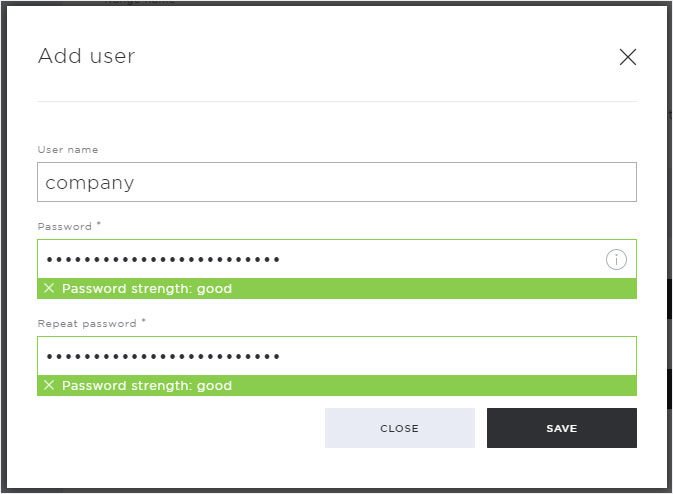
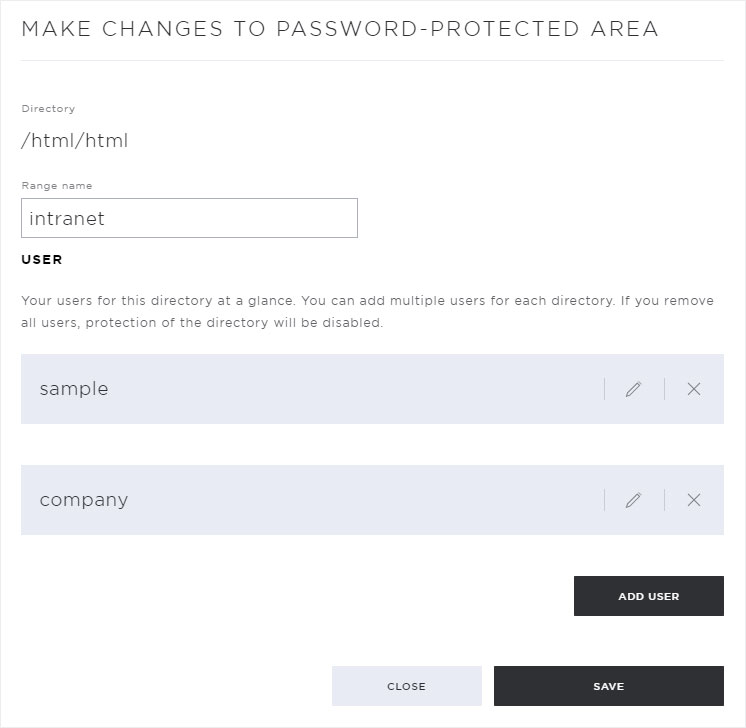
The new user appears immediately in the overview.
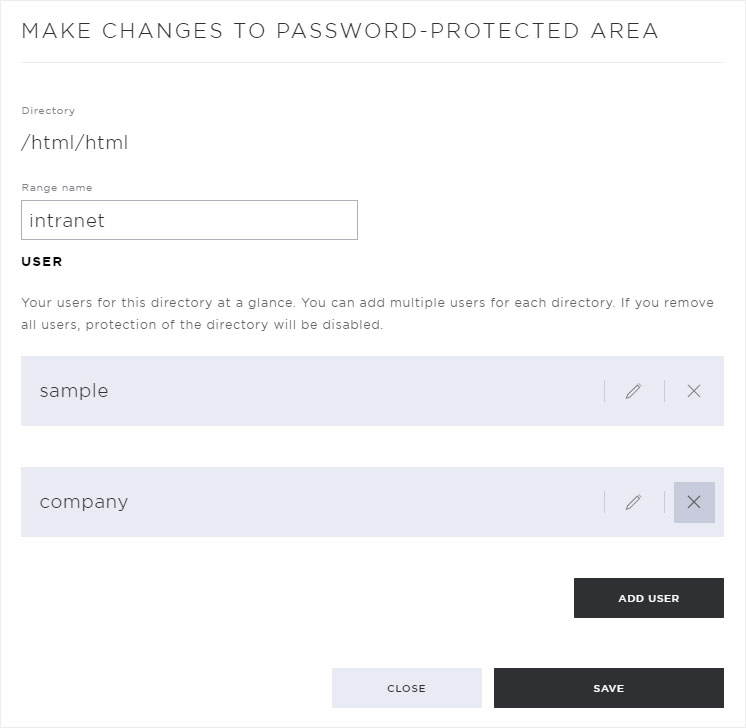
Removing users
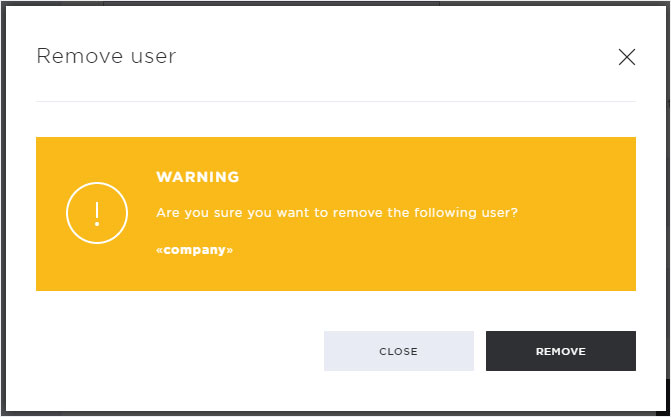
Click the X to remove the desired user.
A warning message appears. Click the Remove button to remove the user.
7. Remove password-protected area (directory)
There are two options for disabling password protection for a certain directory.
1. Remove each user individually
2. Disabling password protection for directories
Remove each user individually
One-by-one, remove each user as described in the section Removing users.
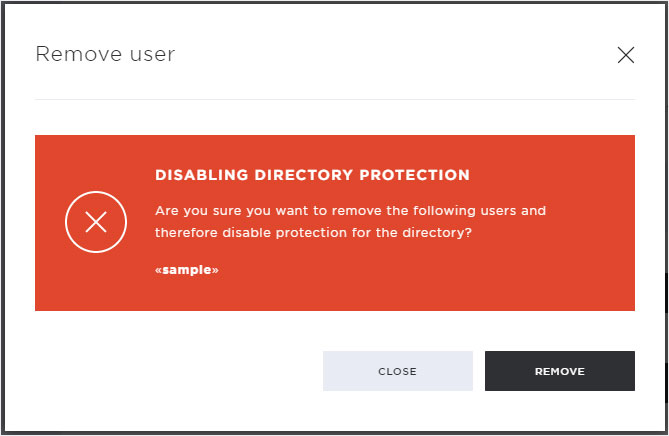
When you remove the last user, the Disabling directory protection warning appears. This message reminds the user that removing the last user will disable password protection for the directory. The respective directory (e.g. sample) then becomes publicly accessible.
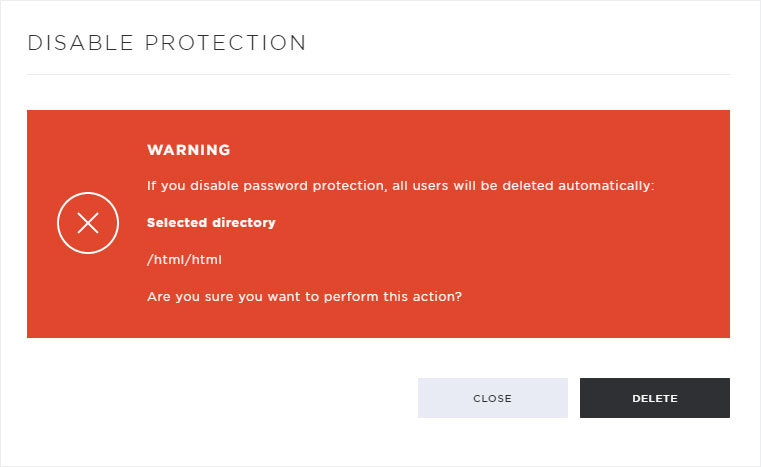
Disabling password protection for directories
If you want to disable password protection for a directory (e.g. html), click on the lock icon.
Then click on the Delete button to disable password protection for the selected directory, including all users. This cannot be undone.