Manage aliases
If you wish to use a MailPro email address for which you have not set up a mailbox, but instead have emails forwarded directly to an existing MailPro email address, you can create an email alias.
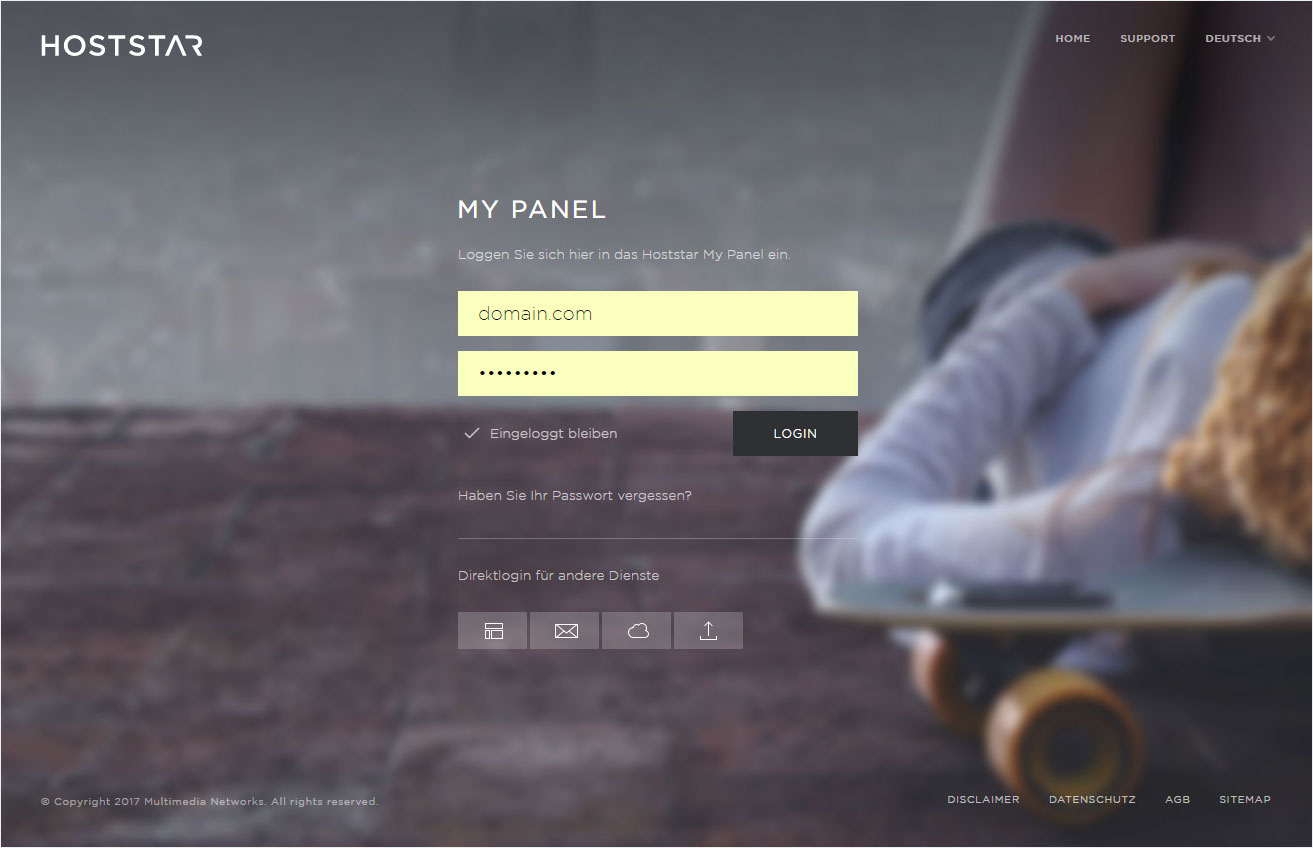
Follow these steps:
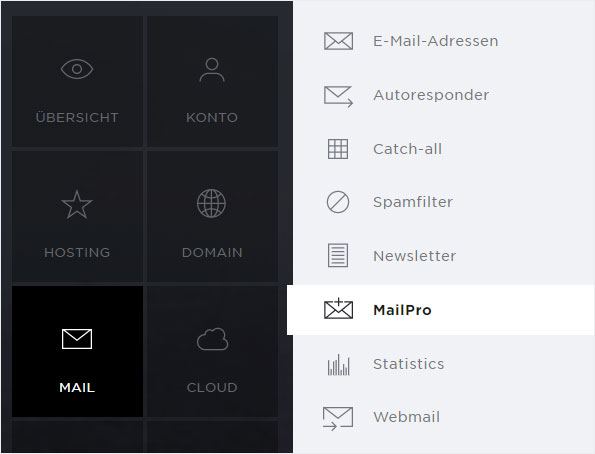
2. Selection
Select the Mail → MailPro menu item.
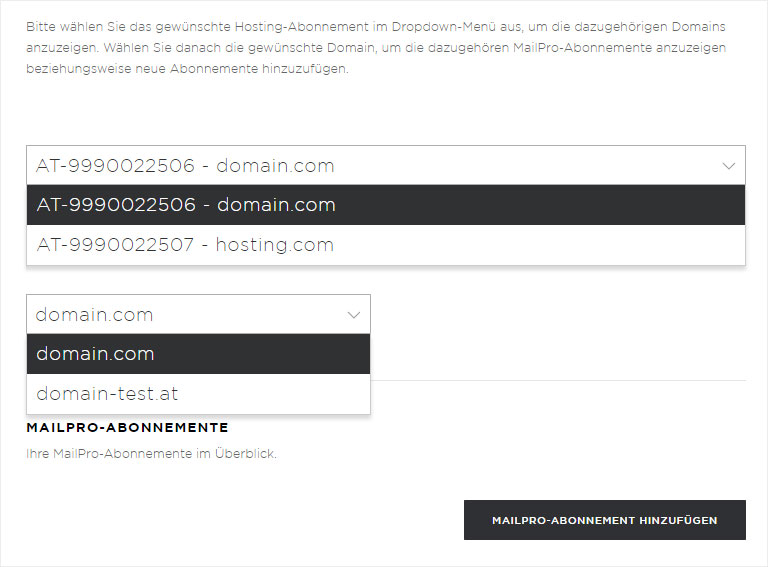
3. Select subscription and domain
Select your subscription and the matching domain for which you would like to add an email alias address for your MailPro subscription.
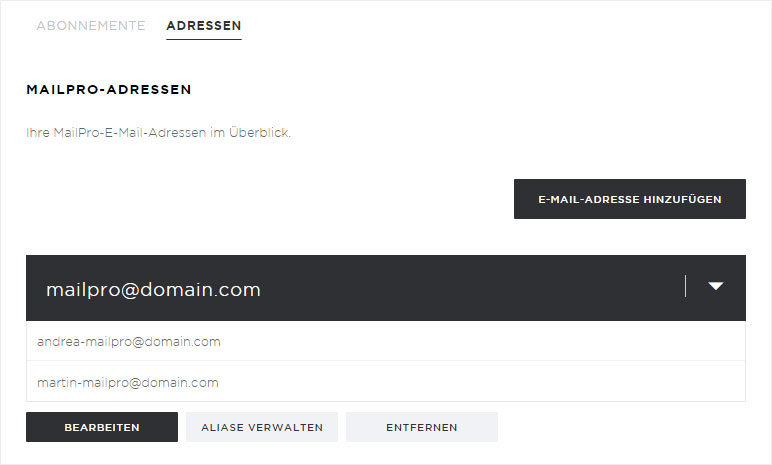
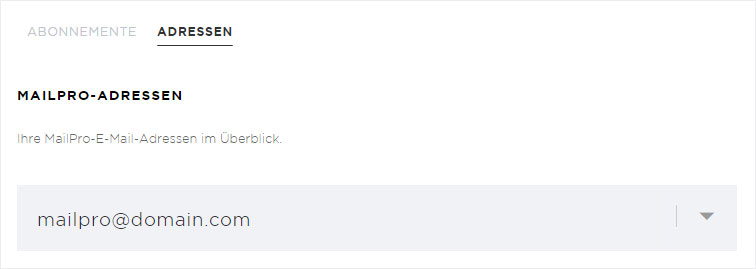
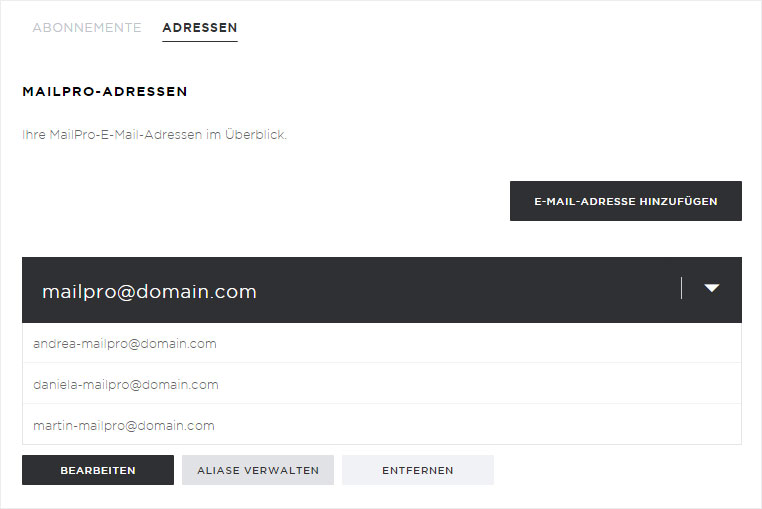
4. Addresses
Now select the Addresses area. The Addresses view will now be displayed.
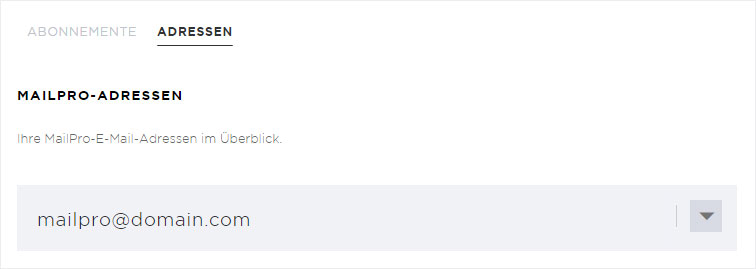
5. Details view
Click on the drop-down arrow for the desired email address in order to access the detail view of that address.
6. Button display
You will now see various buttons. Click Manage aliases. You can now add and/or delete aliases.

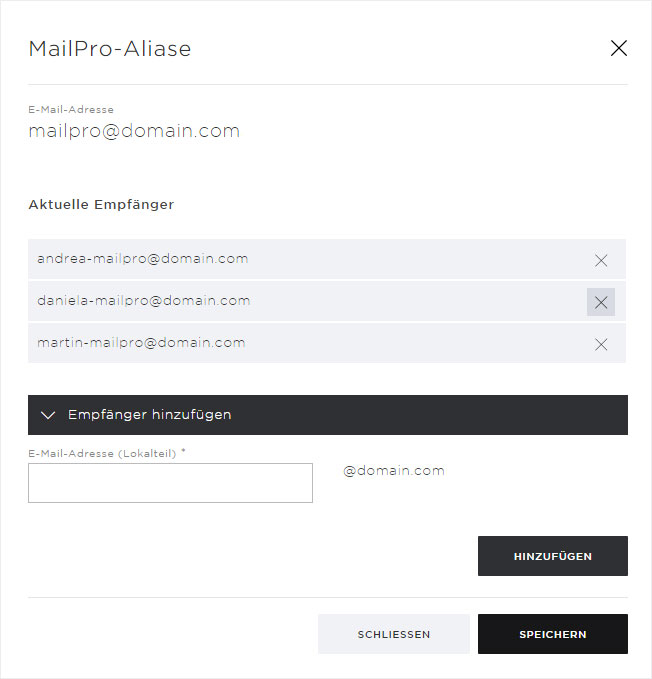
1. Add alias
In the pop-up window that now appears, enter the new alias email address. Here, under email address (local section), enter the desired alias address and then click on Add.
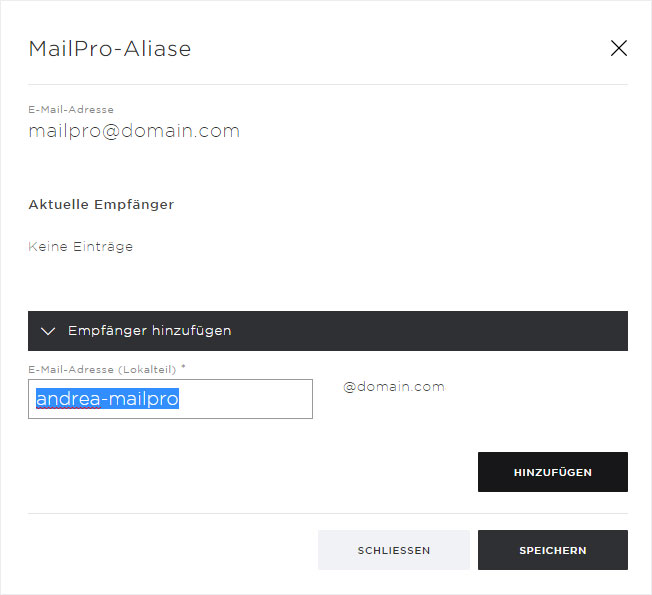
2. Save
Repeat these steps until you have entered all of the desired alias email addresses, then click Save.

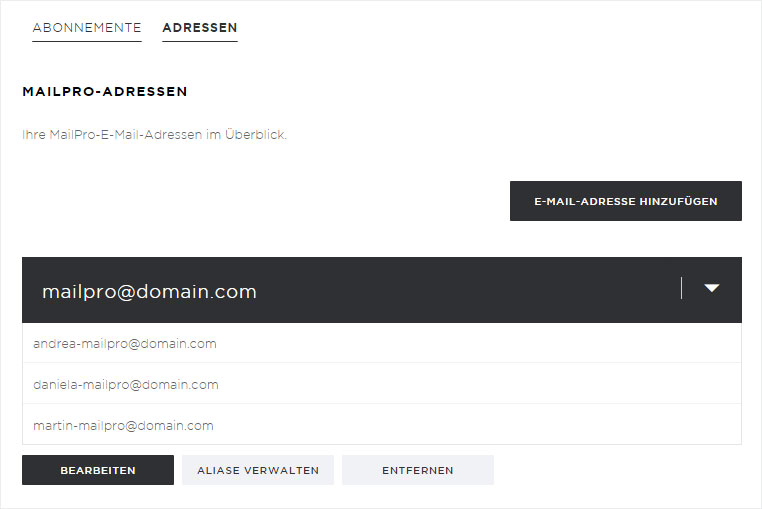
3. Overview
The alias email addresses entered are now valid and will be displayed in the detail view for the relevant email address.
1. Delete alias
To delete an alias email address, click on the Manage aliases button in the detail view for the relevant MailPro email address.
2. Remove alias address
In the pop-up window that now appears, the alias addresses are displayed under Current recipients. To delete an alias, click on the X icon for the relevant address.
3. Save
Once you have removed the alias address, click on the Save button to save your changes.
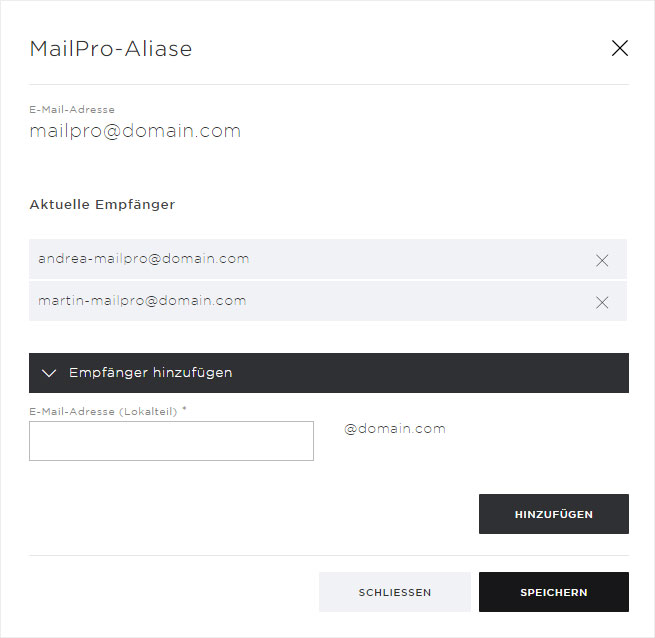
4. Overview
The changes made are now valid and will be displayed in the detail view for the relevant email address.