APPLE - iPhone (iOS ab 11.0)
Once you have set up the email address in My Panel, you can then add the account to your iPhone. Follow these steps:
Automatic configuration
You can configure your email address automatically as an IMAP account on your iPhone. Open the following page on your iPhone: Apple – Automatic configuration
Manual configuration
If you have problems with the automatic configuration, follow the instructions below to set up your email address manually.
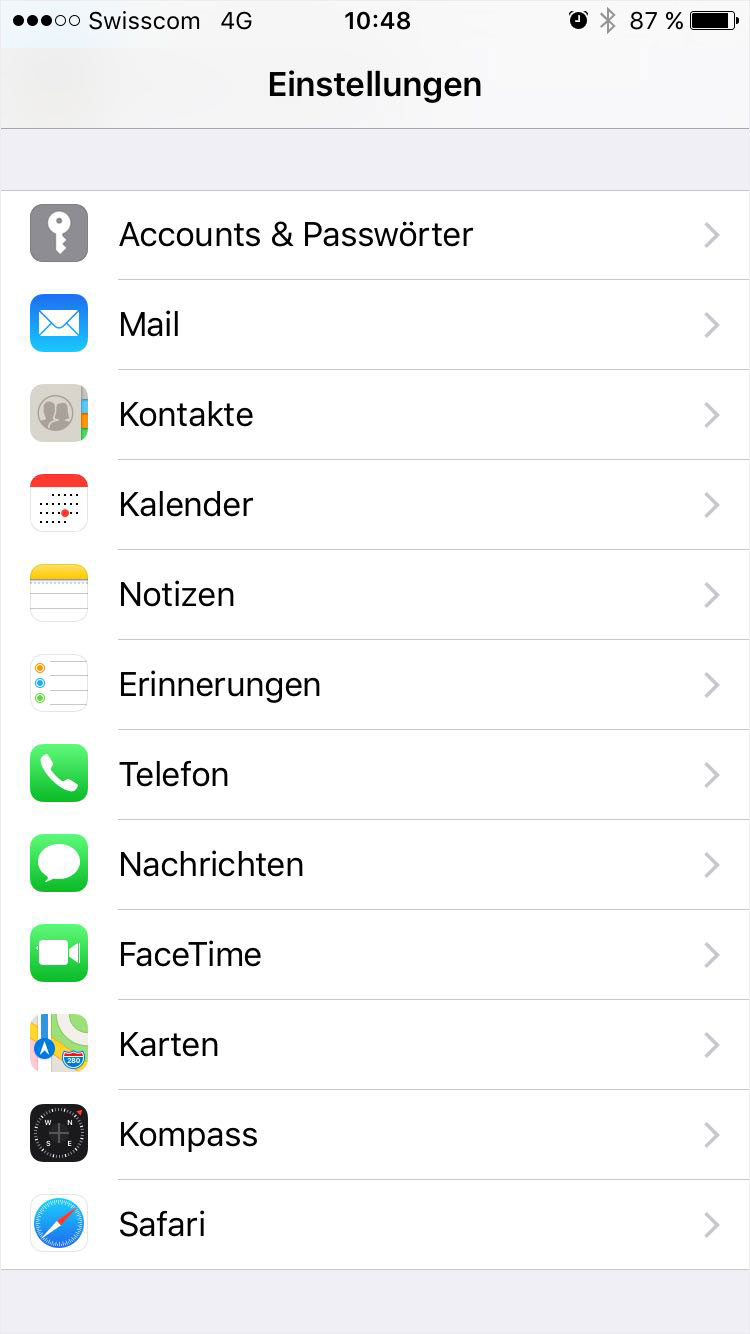
1. Add account
Open Settings on your iPhone.
Select Accounts & Passwords.
2. Add account
Then select Add Account....
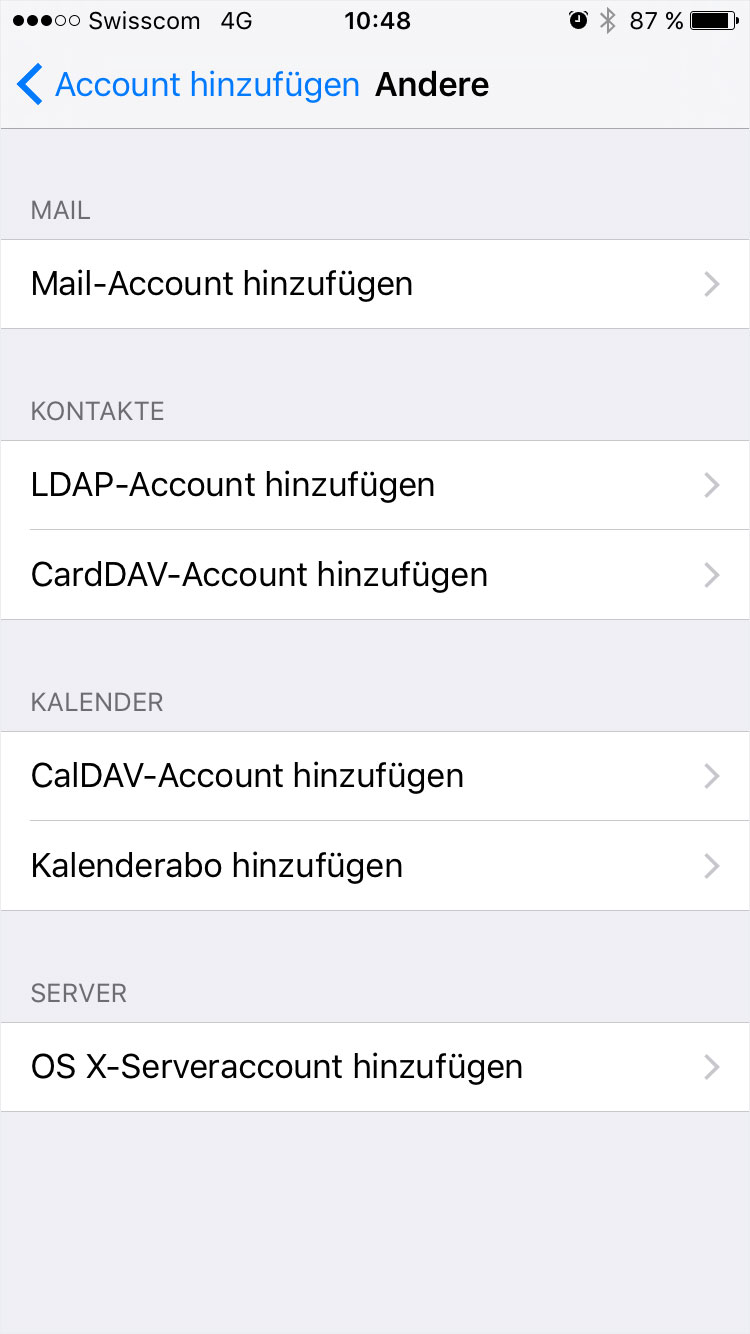
3. Select account type
Select Other.
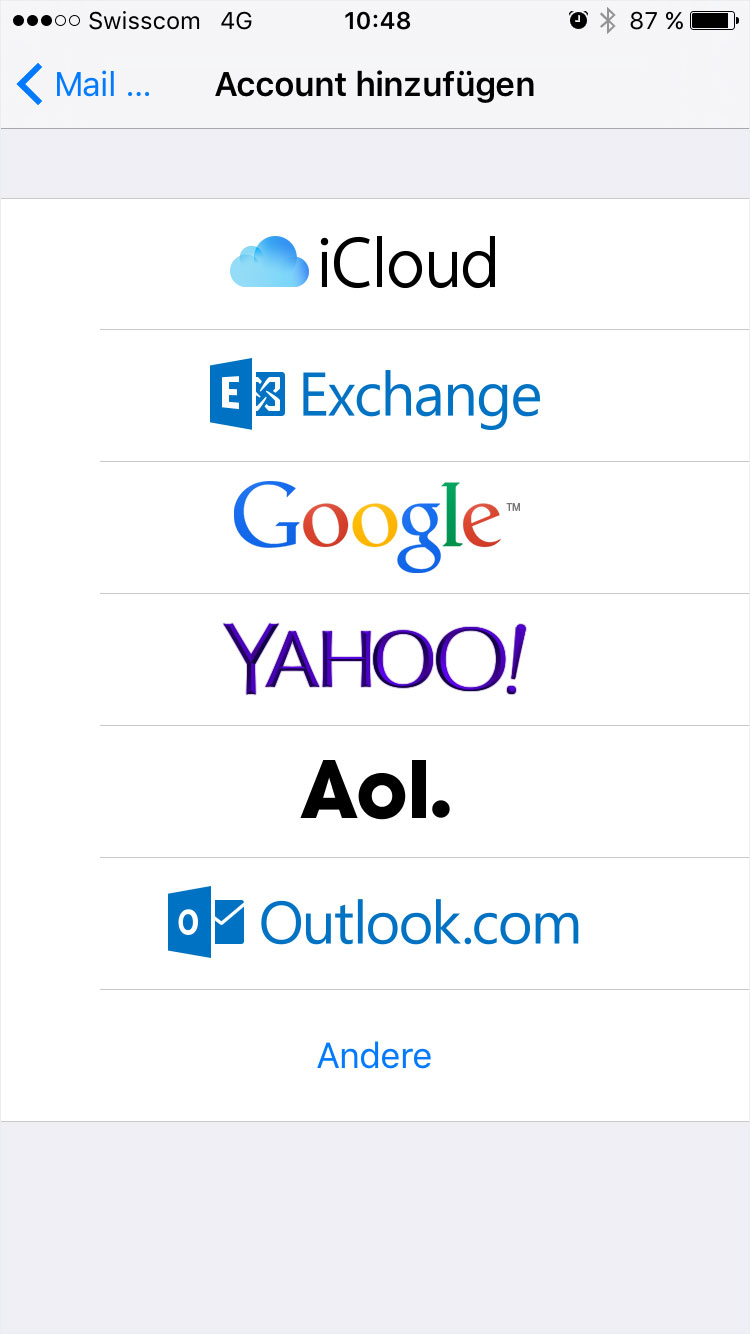
4. Mail account
Now select Add Mail Account.

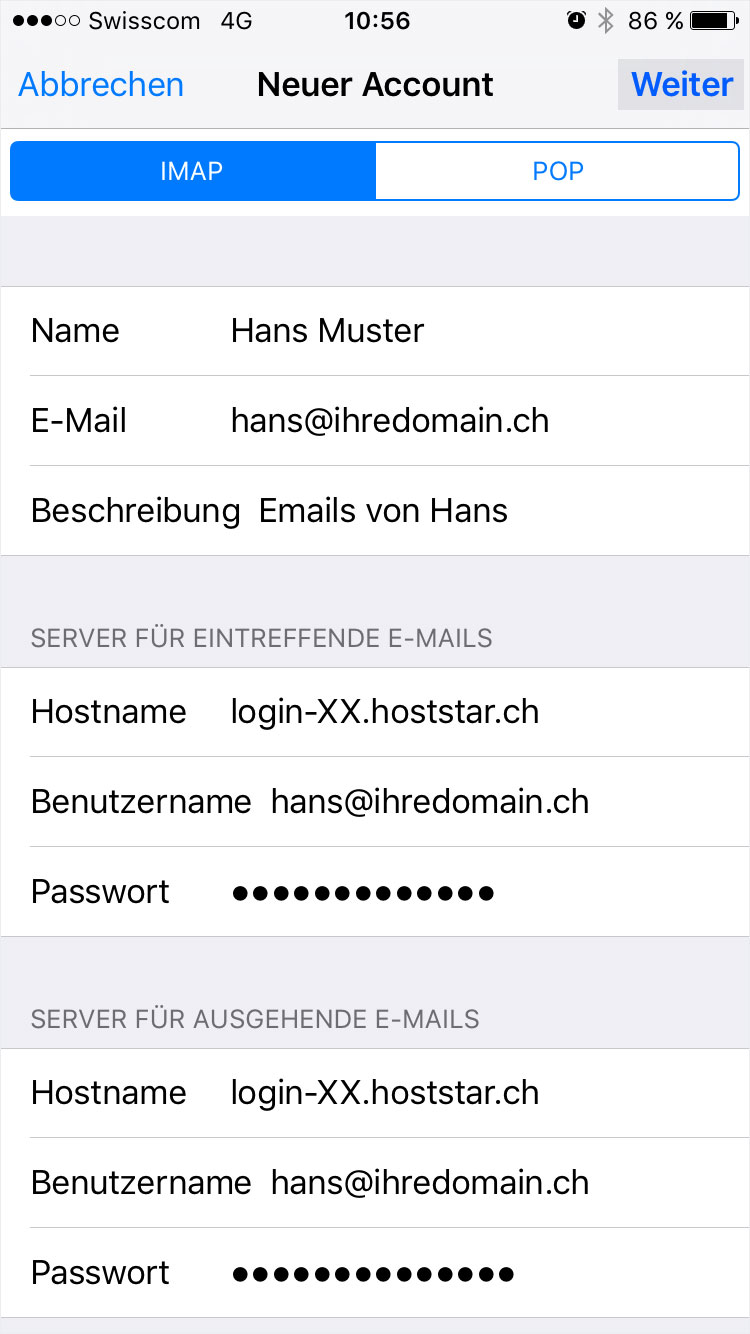
5. New account
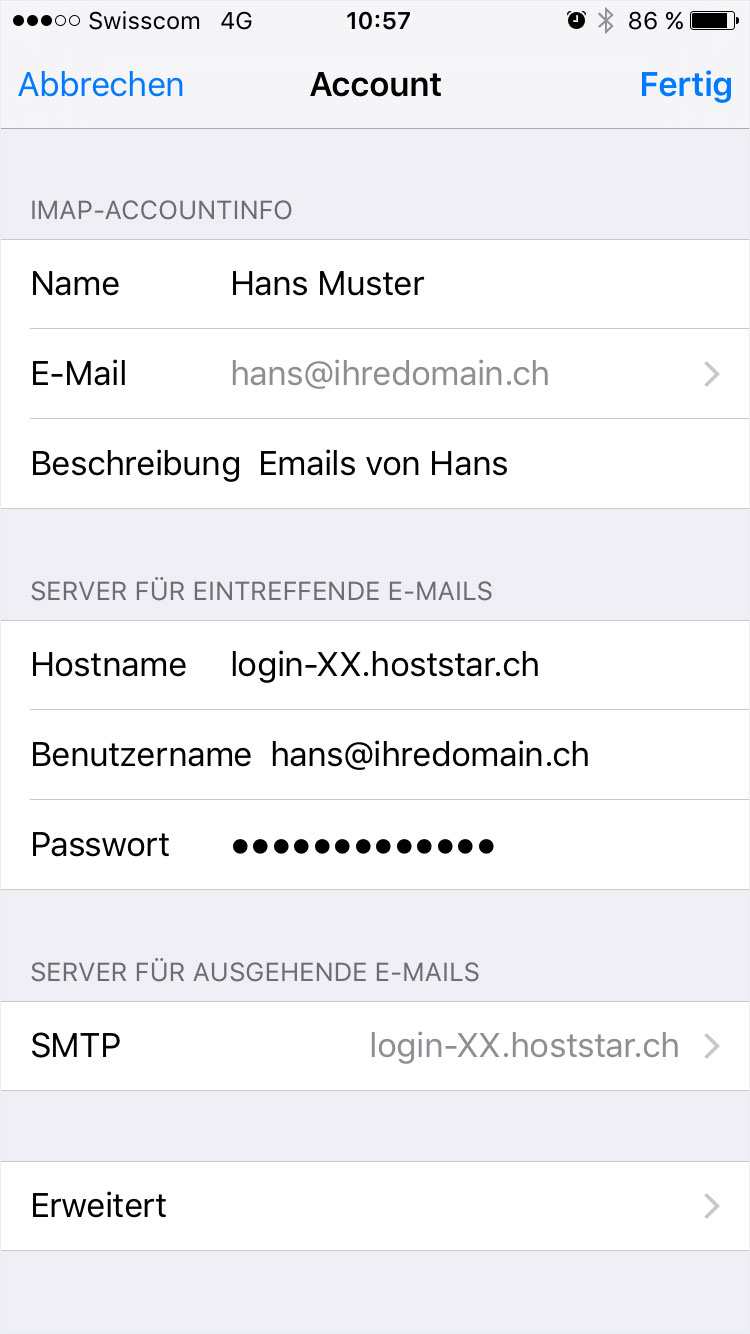
Name: Enter your first and last name or company name. (This field is user-definable.)
Email: Enter the email address you want to configure.
Password: Enter the password for the email address you set previously in My Panel. If you do not know the password, refer to the instructions for changing your email password.
Description: Enter a description for the account as desired.
6. NEXT
After you have completed all fields, press Next.
7. IMAP OR POP
Select POP or IMAP. We recommend using IMAP to access your emails because the emails remain saved on the server. This allows you to read emails on other computers and mobile devices. In the case of POP, emails are downloaded to your iPhone and then deleted from the server.
You also have the option to enable SSL. The SSL connection is used to encrypt the connection between your iPhone and the email server, making it more difficult for hackers to read your emails.
Now select the protocol you want to use to retrieve your emails. Next, enable SSL encryption if desired. The various settings options change depending on what you choose.

8. Server details
Host name: Enter login-XX.hoststar.ch. (Replace XX with the actual server number for your hosting account.)
User name: The username is the email address you want to configure.
Password: Enter the password you set for that email address in My Panel. If you do not know the password, refer to the instructions for changing your email password.
The server settings for incoming and outgoing emails are identical.
Click Next and then Save.
9. Outgoing mail server
Now open the account you just created.
Your settings should now match those shown in this image.
Click SMTP under the heading Outgoing Mail Server.
10. Primary server
Click the field under Primary Server.
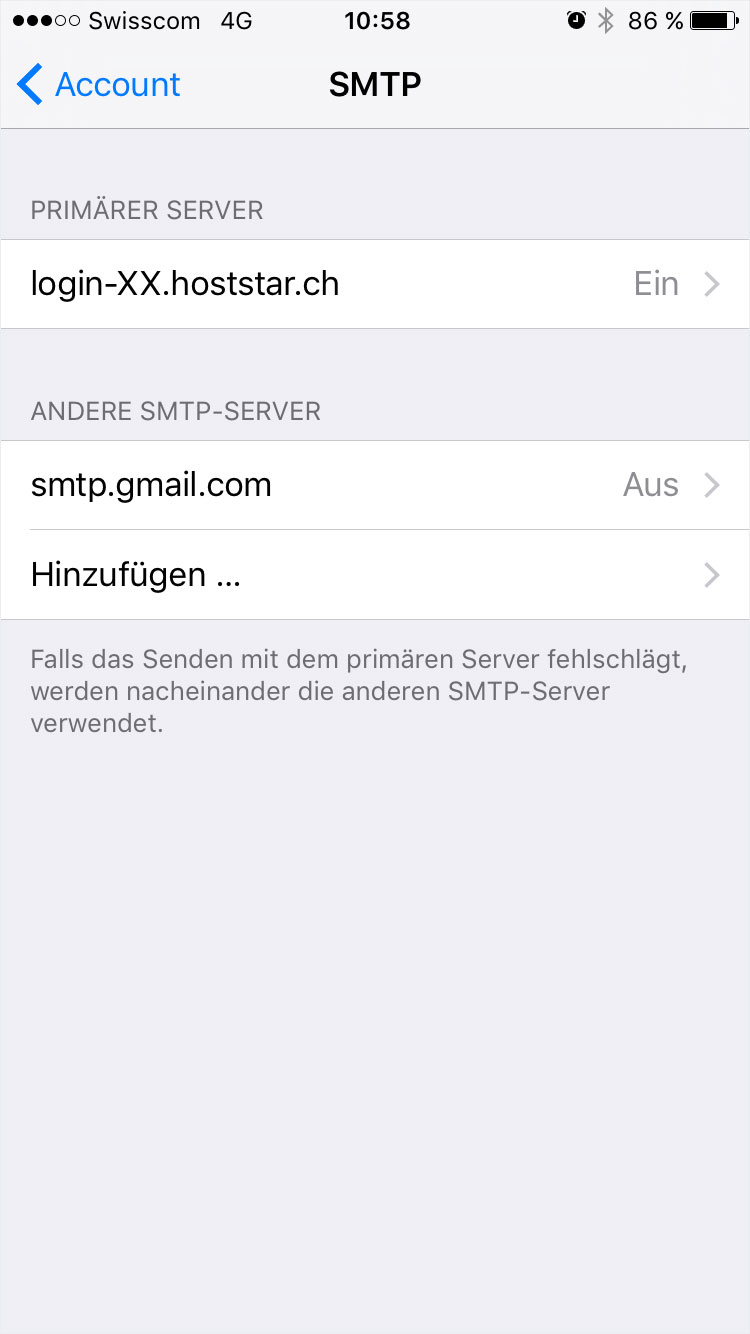
11. SMTP settings
Configure the SMTP settings to send emails from your iPhone.
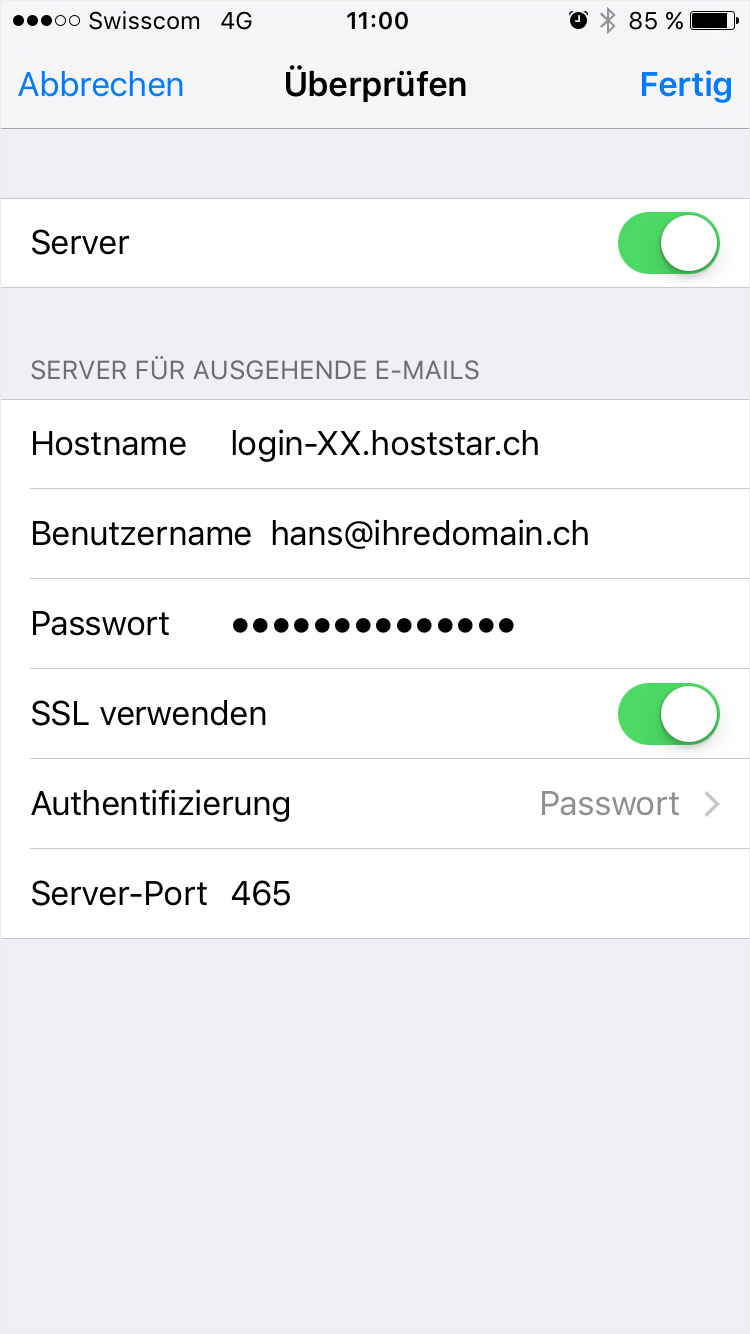
If you want to use SSL encryption, enable the Use SSL option.
Under Authentication, select Password and then enter the user details (email address and password). If you do not enter these details, you will be unable to send emails from your iPhone.
If you are not using SSL, enter 587 in the Server Port field or enter 465 if you are using SSL.
12. SAVE
Click Done to save your settings and return to the main page of your account.
Next, click on Advanced at the bottom of the page.
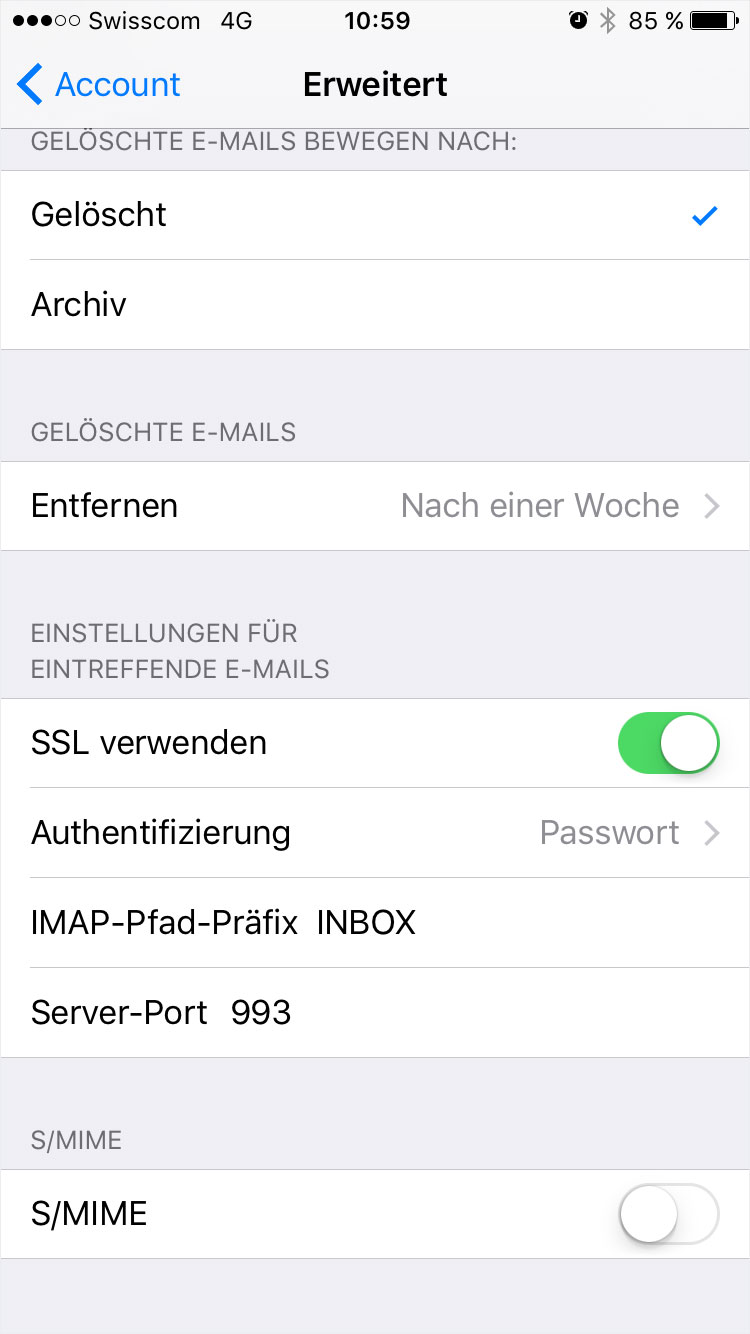
13. IMAP settings
Configure the IMAP settings to retrieve emails using IMAP.
Under Mailbox Behaviours you can select folders for your sent, deleted or draft messages (normally these are Drafts, Sent and Trash) on the server or your iPhone. We recommend using these settings for all of the entries to avoid problems when moving emails.
The Deleted Mailbox setting lets you specify a period of time before deleted emails are permanently deleted from the Trash folder.
If you want to use SSL encryption, enable the Use SSL option.
Under Authentication, select Password and then enter the user details (email address and password). Otherwise, you will be unable to receive emails.
Under IMAP Path Prefix, enter INBOX. This allows emails to be accessed correctly on the server.
If you are not using SSL, enter 143 in the Server Port field or enter 993 if you are using SSL.
14. Finish
Return to Account and click Done.
All settings for your email account on your iPhone have now been configured.