Cron jobs
If you want to execute a PHP or Perl script, Lynx or wget command once or on a regular basis, you can set up a cron job. Creating and editing cron jobs:
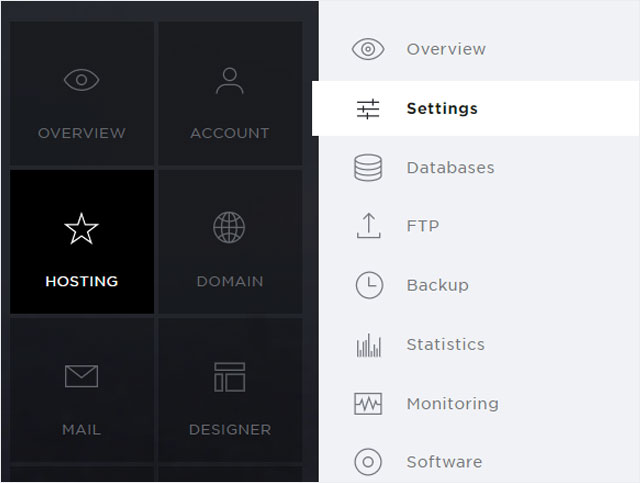
2. Navigate
Click the Hosting menu item and then Settings.
3. Click Cron jobs
Click Cron jobs at the top in the menu.
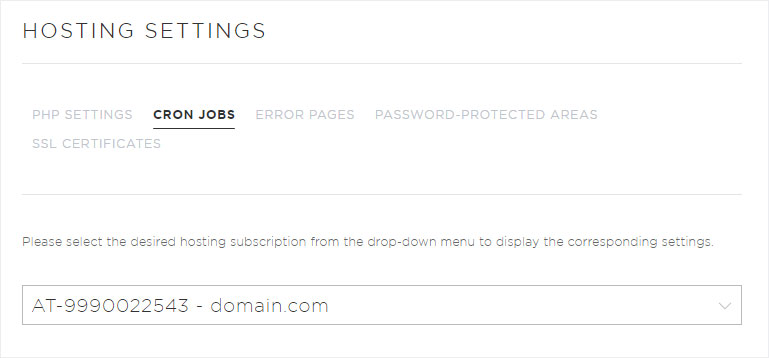
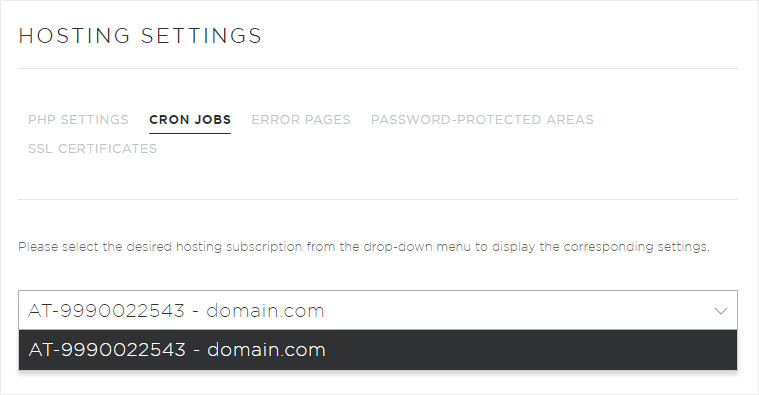
4. Select your subscription
Select the hosting package for which you want to create, change or delete a cron job.
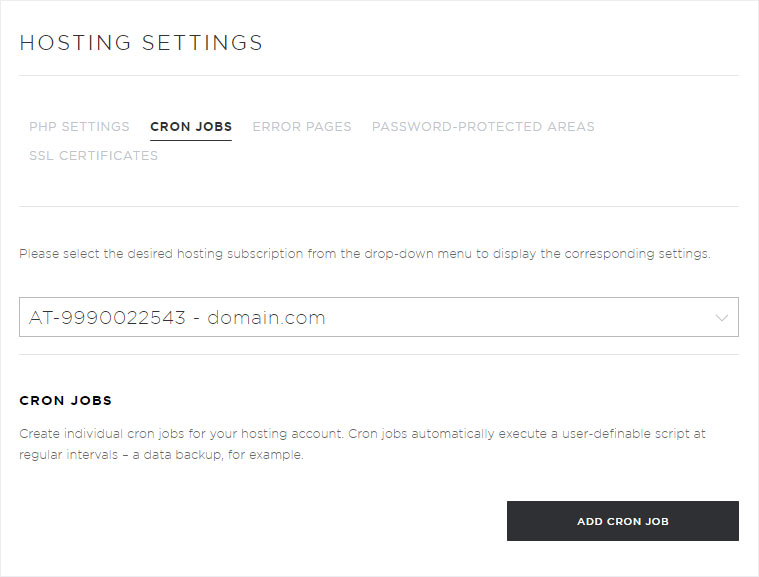
5. Add cron job
Click the Add cron job button to add a new cron job.
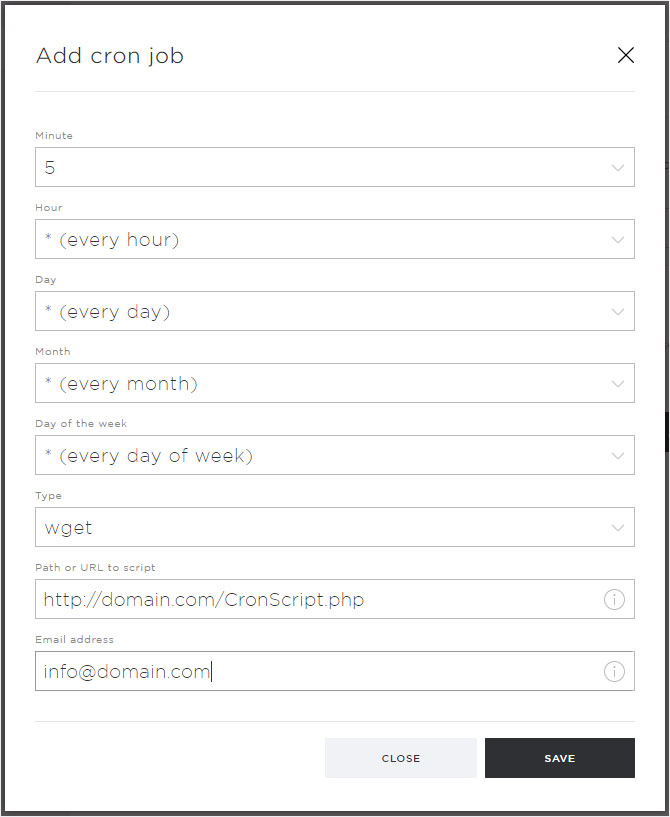
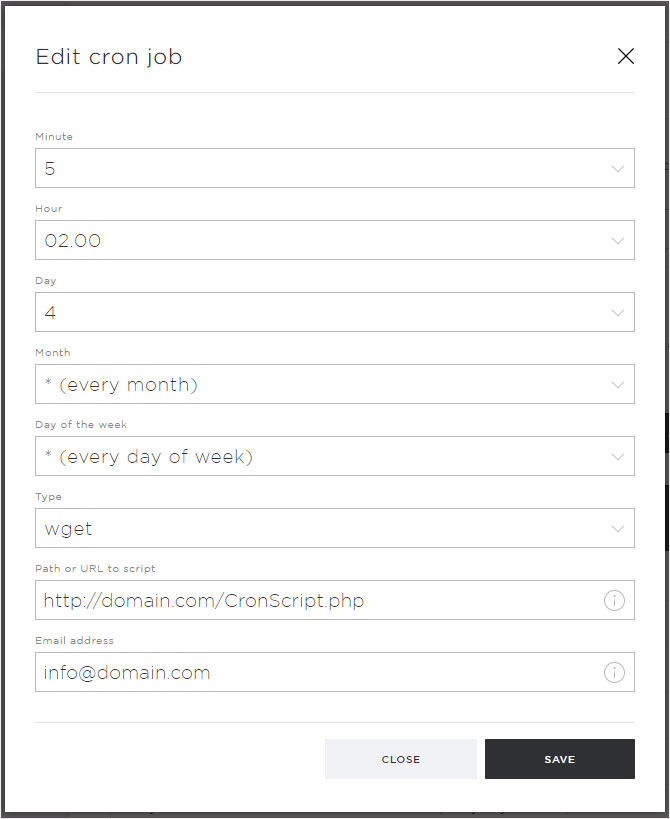
6. Configure cron job settings
You can configure the following parameters for executing the cron job in the pop-up that appears:
Minute
Minute/minute intervals at which you want to execute the cron job (10–55 or every 10–55 minutes).
Hour
Hour at which you want to execute the cron job (00:00–23:00, * for every hour).
Day
Day on which you want to execute the cron job (1–31, * for every day).
Month
Month in which you want to execute the cron job (January–December).
Weekday
Weekday on which you want to execute the cron job (Monday–Sunday).
Type
Type of the script or command. PHP or Perl script or Lynx or wget command.
Script path or URL
Path to the script, starting at the root directory. Example: /html/cron_script.php
Email address
An email address for receiving status notifications when the cron job is executed.
After you have completed the form, click the Save button.
7. Finish
Your cron job is ready and will be executed from now on.
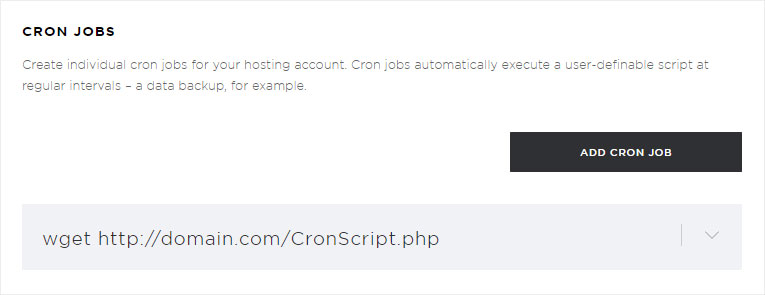
8. Edit cron job
Click the arrow icon next to the desired cron job and then the Edit button.

Make the desired changes. You can configure your settings based on those shown in the Creating cron jobs section of this guide. Click the Save button to apply your changes.
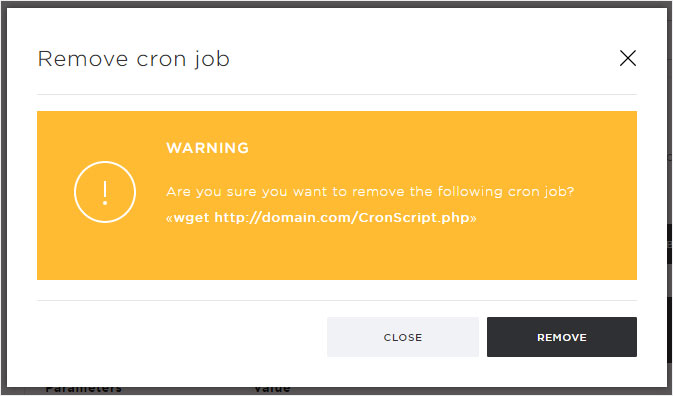
9. Remove cron job
Click the arrow next to the desired cron job and then click the Remove button to delete the cron job.
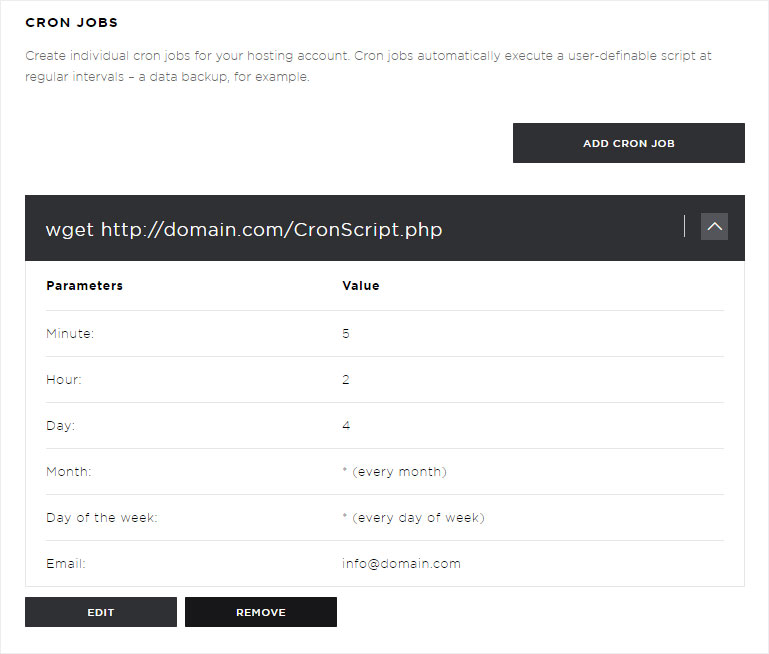
If you are sure you want to delete the selected cron job, confirm the warning message by clicking on Remove.
The cron job is now deleted permanently and can no longer be executed.