OTHER – Mozilla Thunderbird (from version 3)
Once you have set up the email address in My Panel, you can then add the account to Mozilla Thunderbird. Follow these steps:
1. Open the software
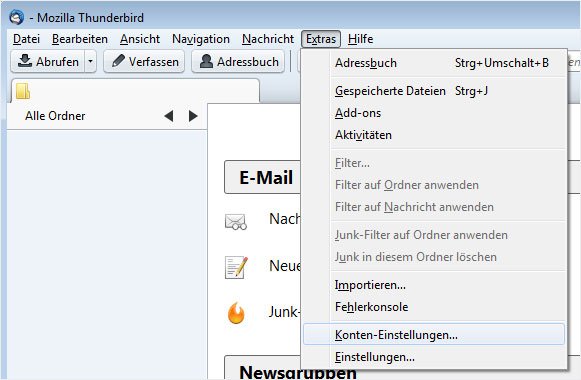
Go to Tools → Account Settings.
2. Add the account
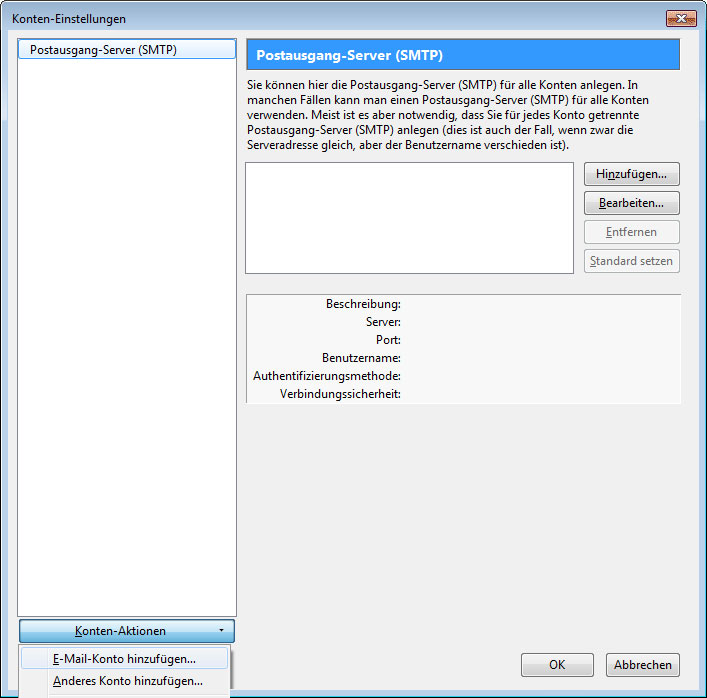
Click Account Actions → Add Mail Account....
3. Enter the details
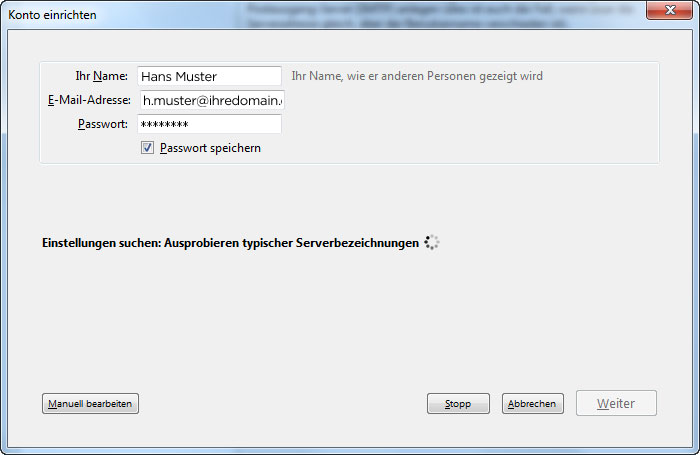
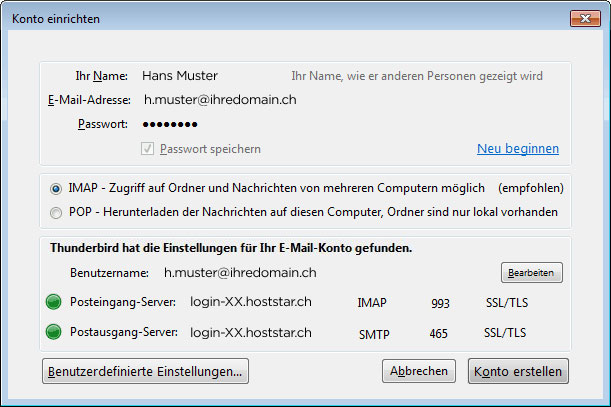
Your name: Enter your first and last name, or the company name. (This field is user-definable.)
Email address: Enter the email address you want to configure.
Password: The password for the email address you set previously in My Panel. If you do not know the password, refer to the instructions for changing your email password.
Remember password: Enable this option if you want to save the password (recommended) so that you do not have to enter it each time you check your emails.
Then click Next.
4. Automatic configuration
Thunderbird will now search for the appropriate server settings. Both the incoming and outgoing mail server are configured automatically. If the details are correct, click Create account and go to step 6.
If the automatic configuration was unsuccessful, go to step 5.
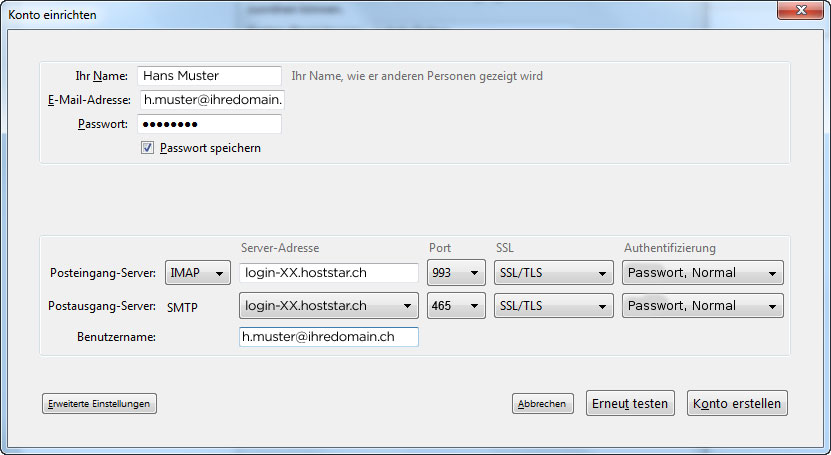
5. Manual server configuration
If Thunderbird was unable to perform the automatic configuration, you have to change the suggested entries manually. Click Manual config.
Incoming mail server: Select POP3 or IMAP. We recommend using IMAP to access your emails because the emails remain saved on the server. This allows you to read emails on other computers and mobile devices. In the case of POP3, emails are downloaded to your computer and then deleted from the server.
Enter lx#.hoststar.hosting in the Server hostname field for the incoming mail server. (The first letter of the server name is a small L like Linux. Replace # with the effective server number of your hosting).
The port for the incoming mail server varies depending on the protocol you have selected (POP3 or IMAP) and whether SSL is enabled. Depending on the configuration, select the following port:
- IMAP without SSL: 143
- IMAP with SSL: 993
- POP3 without SSL: 110
- POP3 with SSL: 995
Outgoing mail server: Enter the same server address here as for the incoming mail server.
SSL: Enter port 587 if you are not using SSL or port 465 if you are using SSL.
User name: Enter the email address in the Username fields for the Incoming and Outgoing servers.
Then click on Done.
6. Finish
Click OK to close the account window. You have now completed setting up your email account.

7. Advanced IMAP folder settings
If sent emails, drafts and deleted emails are not being saved correctly on the server, follow these steps to configure the folders correctly:
Go to Tools → Account Settings.
Under the desired email account, select Copies & Folders.
You can now select the relevant folders in each section. The folder on the server is located under the name of the email account, usually under the email address.
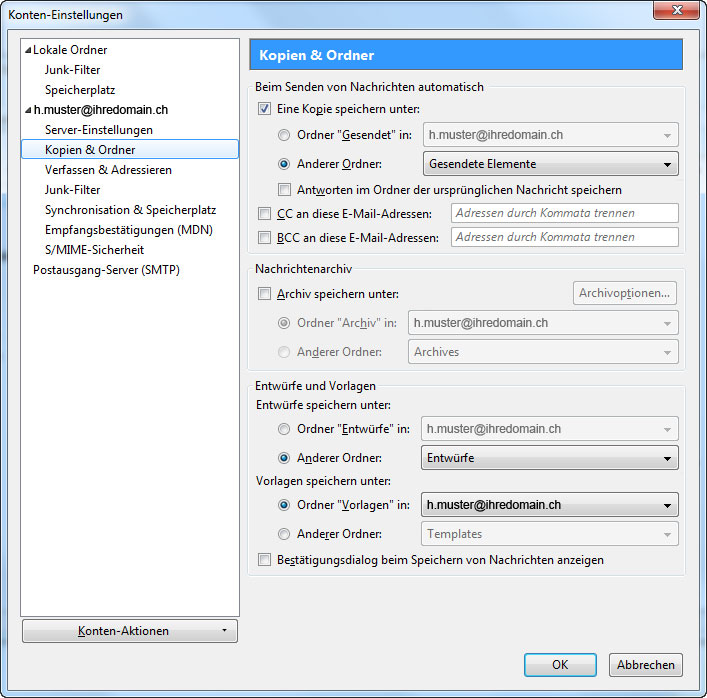
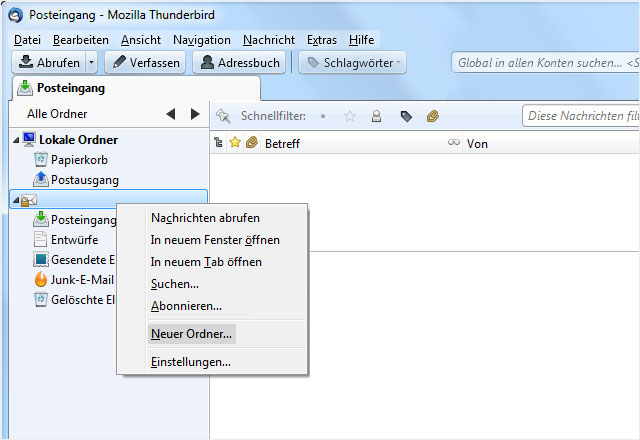
If Thunderbird returns an error message stating that a certain folder could not be found on the server, you have to create this folder manually. To do this, right-click on the desired mailbox in Thunderbird, select New Folder... and enter the required folder names: Drafts, Sent and Trash.