iOS – Set up & synchronisation
To get the most out of MailPro push emails, calendar, contacts and task synchronisation on your iOS device (iPhone or iPad), you can configure them as described below. Please note that the screenshots on the left-hand side can vary from your view according to device and iOS version.
1. Add account
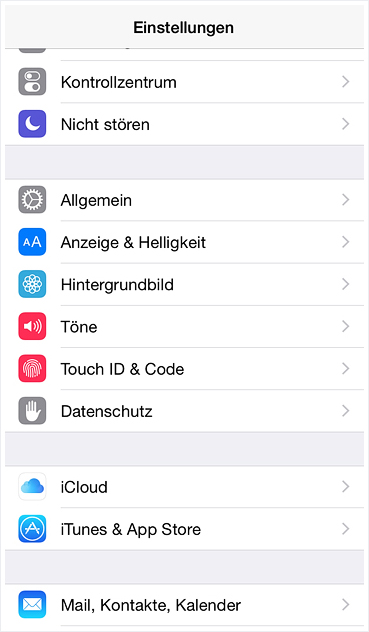
Select the Settings app on your iOS device.
Select Mail, Contacts, Calendar.
In the menu that now appears, go to Add account… to create a new account.
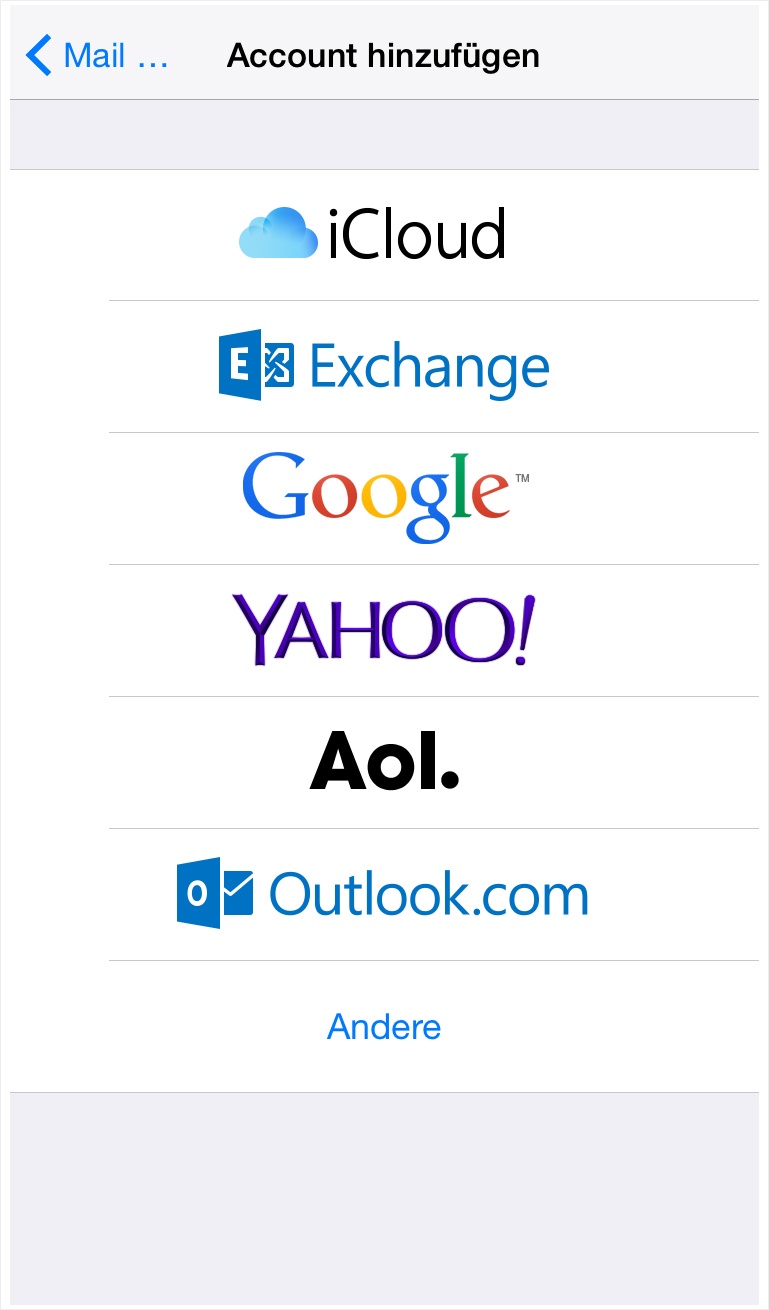
2. Select account type
Select Exchange as account type.
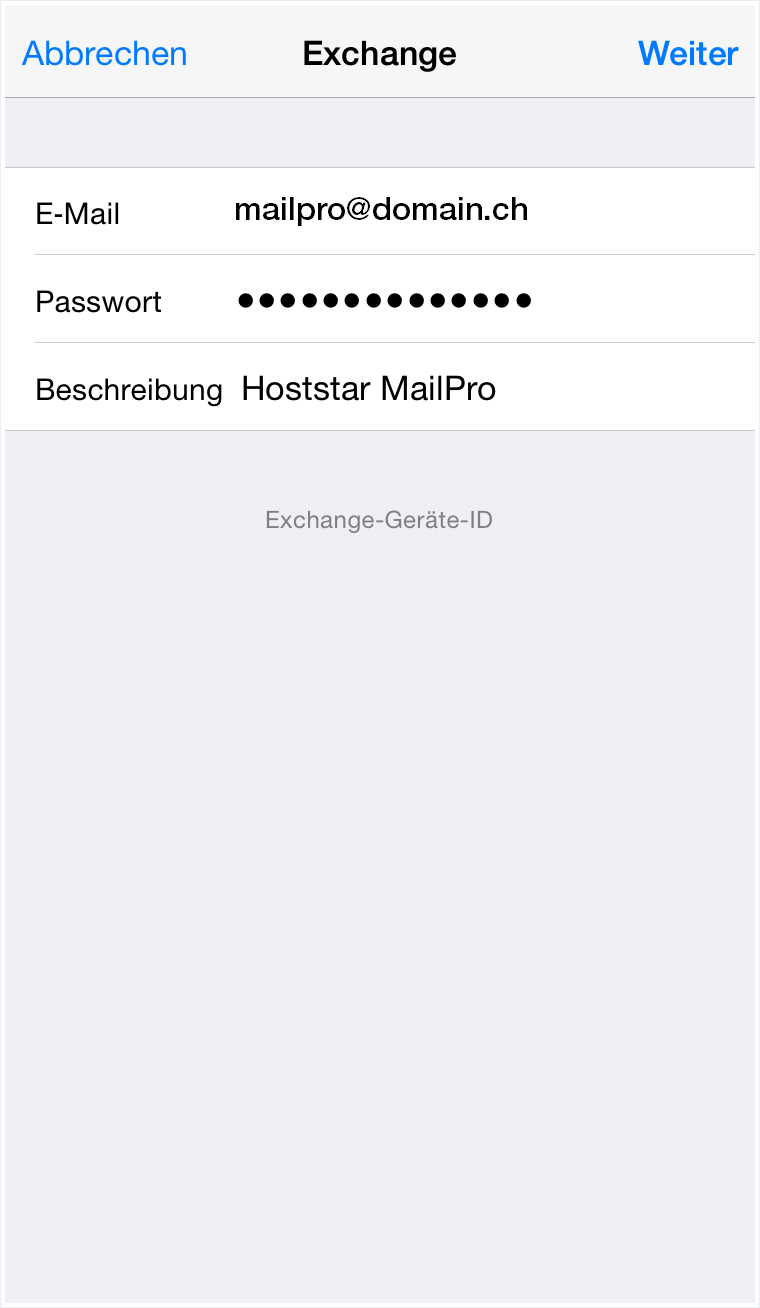
3. Enter login details
Enter the required values.
Email: Enter the MailPro email address you wish to configure. If you are unsure whether the address has already been set up on the server, refer to the MailPro configuration in My Panel.
Password: The password you selected for the MailPro email address in My Panel. If you do not know the password, refer to the instructions for changing/deleting address.
Description: Enter a description for the account as desired.
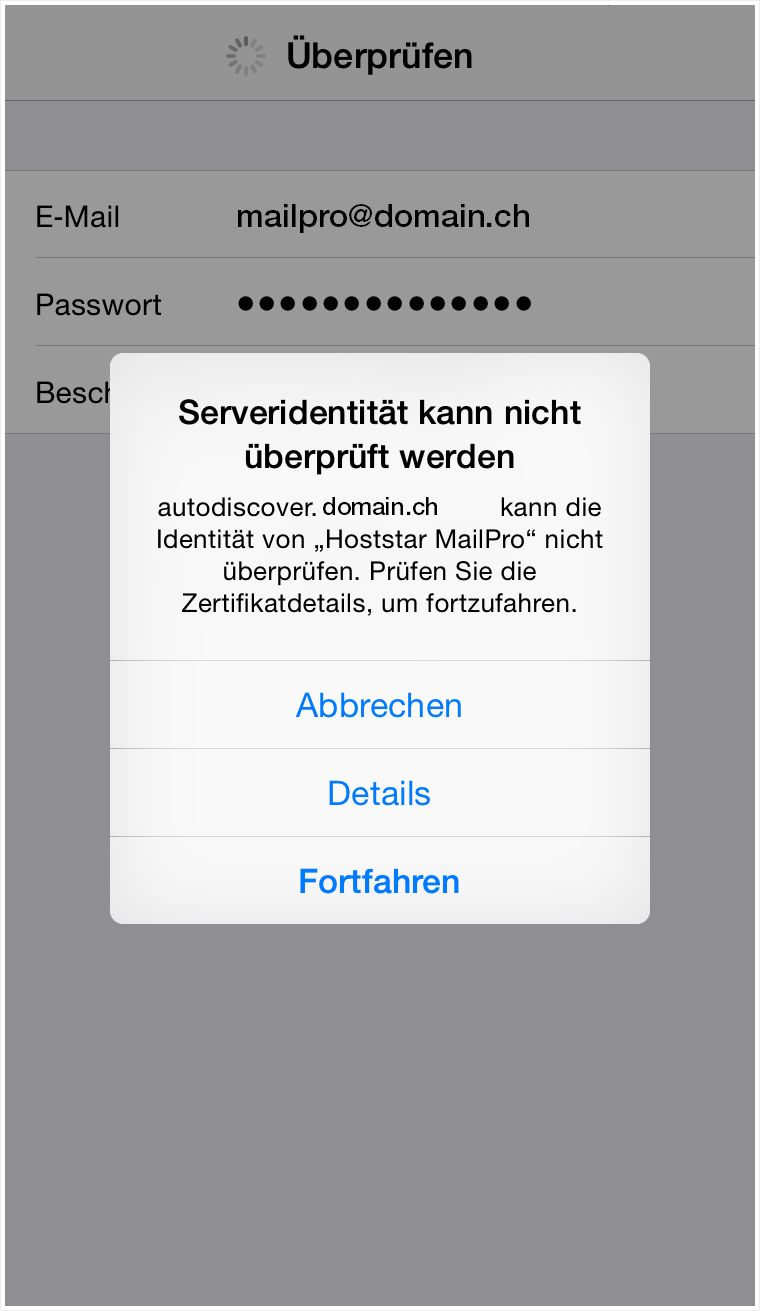
4. Ignore server identity warning
Your iOS device will attempt to download the automatic settings for the MailPro account itself from your hosting package’s server.
However, because the MailPro server can be found under the address mailpro.hoststar.at and a secure connection is thus made with the SSL certificate *.hoststar.at, a warning regarding this discrepancy will appear. The correct settings will be manually entered in the next step, accessed by clicking on Next.
5. Manually change MailPro server settings
You now have the option of manually entering settings in order to establish a connection with the MailPro server.
Enter the following values:
Email: Enter the MailPro email address you want to configure. If you are unsure whether the address has already been set up on the server, refer to the MailPro configuration in My Panel.
Server: mailpro.hoststar.at
Domain: Leave empty or enter your domain (without www.).
User name: Your MailPro email address, just as in the Email field.
Password: The password you selected for the MailPro email address in My Panel. If you do not know the password, refer to the instructions for changing/deleting address.
Description: Enter a description for the account as desired.

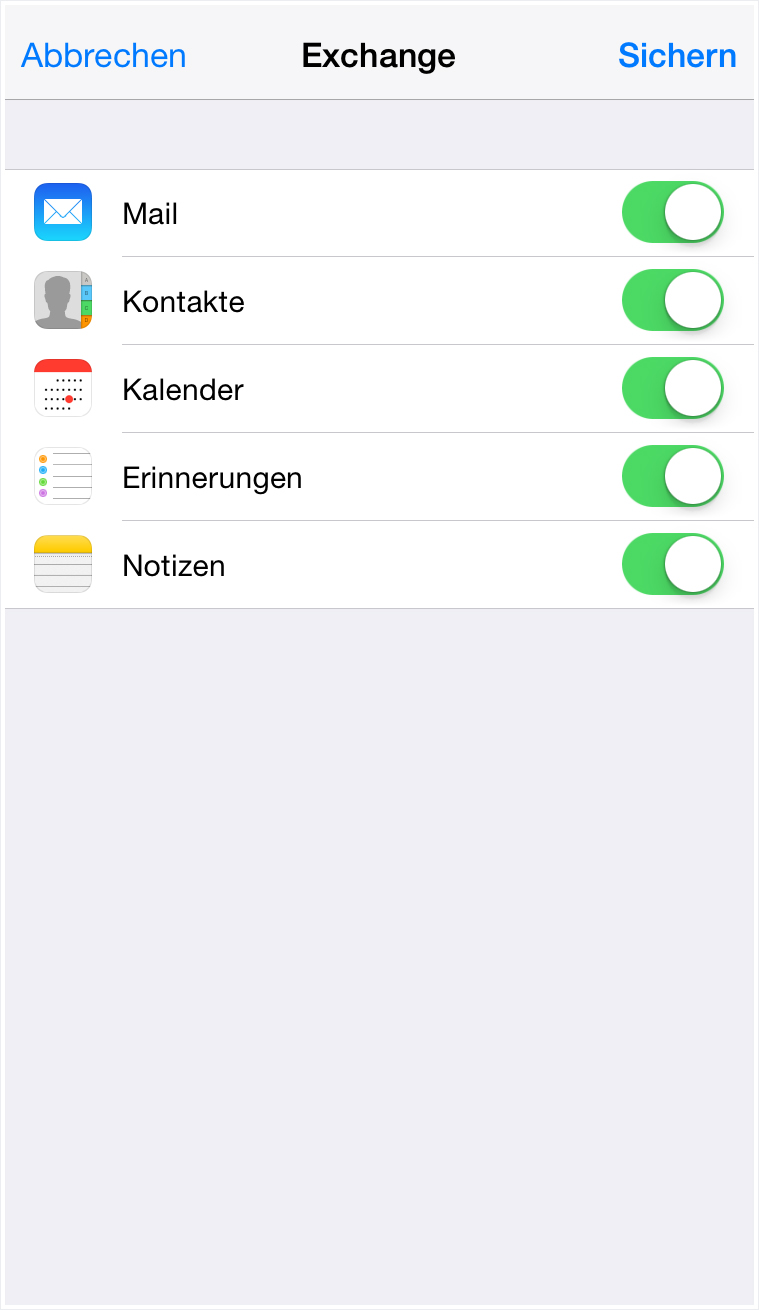
6. Select elements to synchronise
Select elements that you don't wish to be synchronised with MailPro.
With MailPro, emails, contacts, calendar, reminders (tasks) and notices are synchronised as standard.
Select Next, to complete set-up of your MailPro email address on your iOS device.