Outlook 2010 – set-up & synchronisation
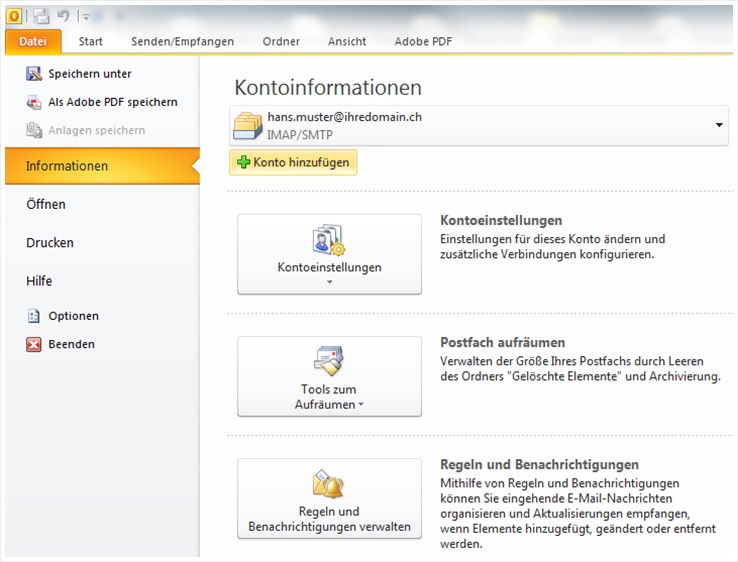
1. Add account
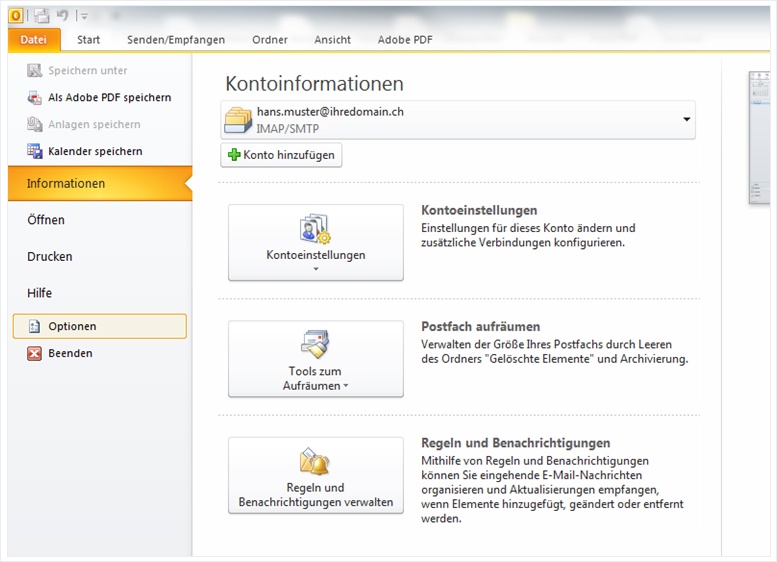
Under File → Information, click on Add account to configure a new account.
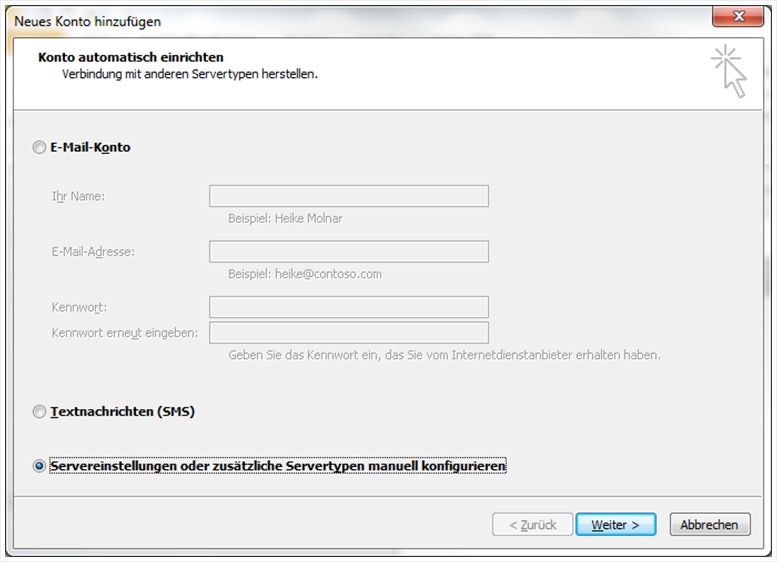
2. Set up account automatically
Select the Manually configure server settings or additional server types option and click Next.
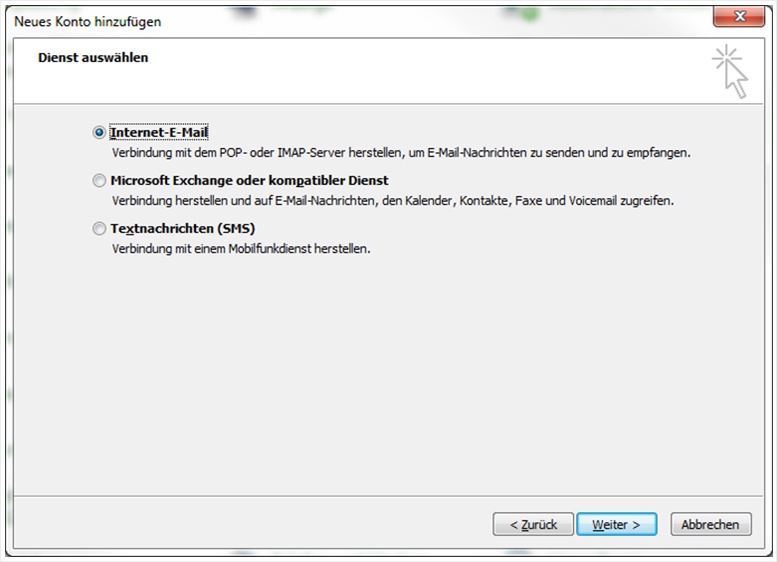
3. Select service
Select Internet Email and then click Next.
4. Internet email settings
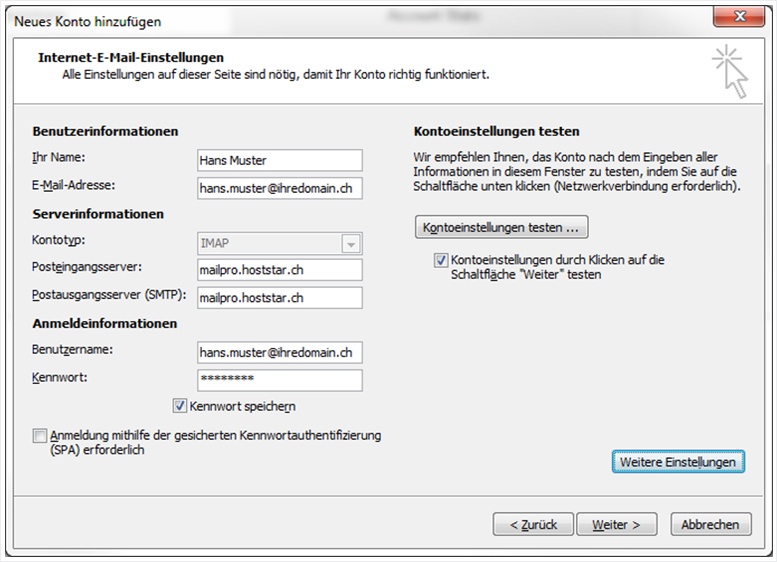
Now enter your email details in the corresponding fields as shown in the following example.
Your name: Enter your name in this field. You can also leave this field blank if desired. If left blank, recipients will see your email address as the sender, otherwise they will see the name entered in this field.
Email address: Enter the email address you wish to configure. If you are unsure whether the address has already been set up on the server, refer to the guide to setting up an email address for MailPro in My Panel.
Account type: Select IMAP as account type.
Incoming mail server: The name of the incoming mail server for MailPro is mailpro.hoststar.AT.
Outgoing mail server: The name of the outgoing mail server for MailPro is also mailpro.hoststar.at.
User name: The user name is the email address you wish to configure.
Password: The password you selected for the email address in My Panel or supplied with your MailPro order.
After you have entered your details, click More settings.
5. Outgoing server
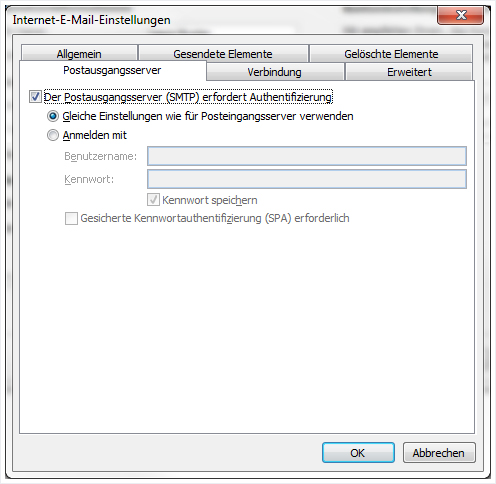
Click the Outgoing Server tab, then enable authentication for the outgoing mail server and the option Use my settings as my incoming mail server.
6. Advanced
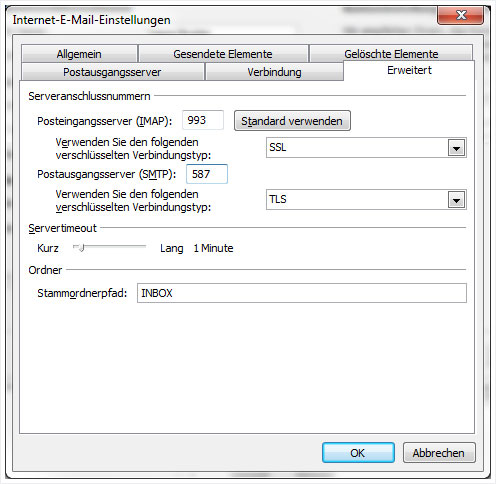
In the Advanced tab, set the connection type for IMAP to SSL and for SMTP to TLS. Change the SMTP port from 25 to 587 and ensure that the IMAP port is set to 993.
If you are using IMAP, enter INBOX (without quotation marks) in the Root folder path field. Otherwise, emails will not be displayed correctly.
Once you have configured the settings, confirm with OK and then click Next.
7. Test
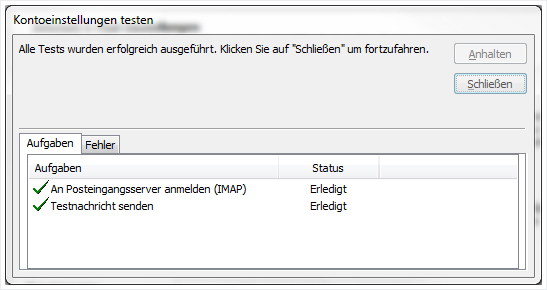
The two subsequent tests carried out by Outlook should both run successfully (as indicated by the green ticks, left). Finally, click Next.
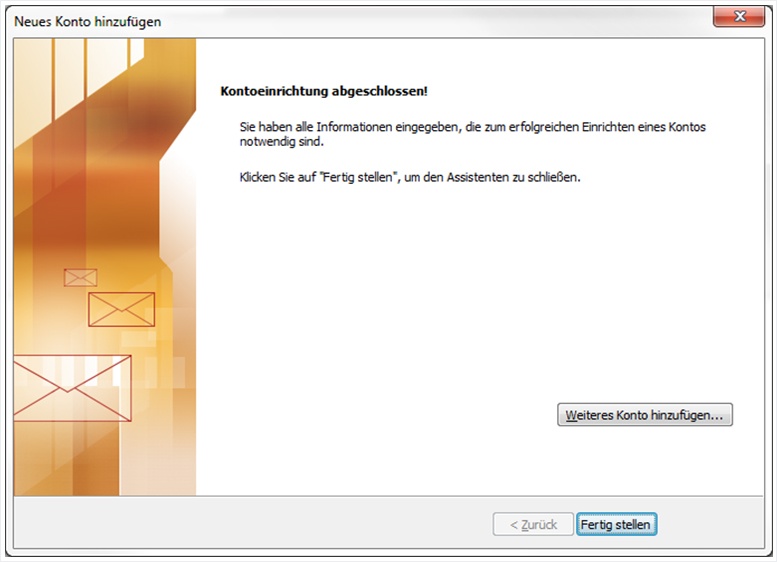
8. Account set-up complete.
You have now finished setting up your account. If you do not wish to set up the synchronisation of calendar and/or contact data, you can finish the configuration now. In either case, click on the Finish button to complete the set-up of your account.
9. Options
Click on Options under File.
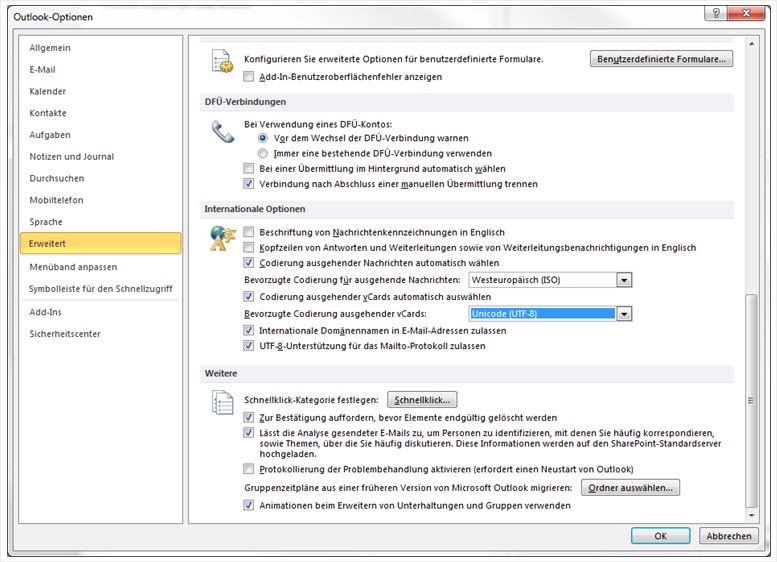
10. Outlook options
Select the Advanced menu item on the left and look for International options on the right – this is located some way down the list. There, set the preferred coding for outgoing vCards to Unicode (UTF-8). This setting helps prevent problems that can arise with synchronisation of contact data containing umlauts and other special characters.
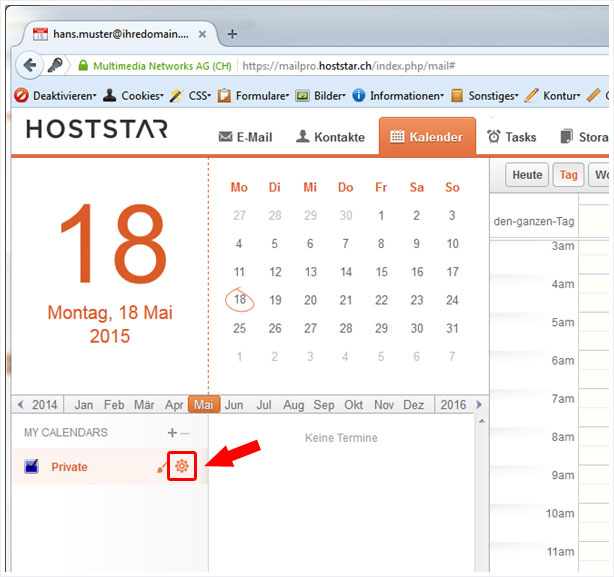
11. MailPro calendar view
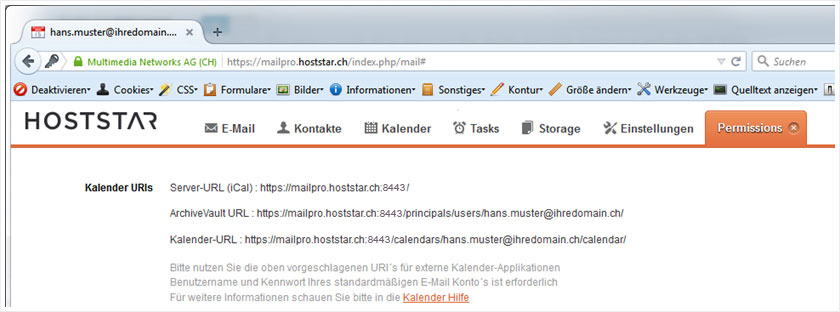
For the synchronisation of the calendar you will need the WebDAV URL through which the calendar can be retrieved. To get this, log in to your Webmail at https://mailpro.hoststar.at , click on the Calendar menu at the top and then under MY CALENDARS, on the calendar you wish to synchronise, on the cog icon to the right.
12. Calendar URLs
You can ignore the first two calendar URLs. Only copy the address denoted as Calendar URL. For the standard calendar, the URL essentially always has the same format:
With SSL: https://mailpro.hoststar.at:8443/calendars/‹email-address›/calendar/
Without SSL: http://mailpro.hoststar.at:8008/calendars/‹email-address›/calendar/<(/code>
13. Copy calendar
As a precaution, first create a backup of your existing Outlook calendar. To do this, right-click on your calendar and then on Copy calendar.

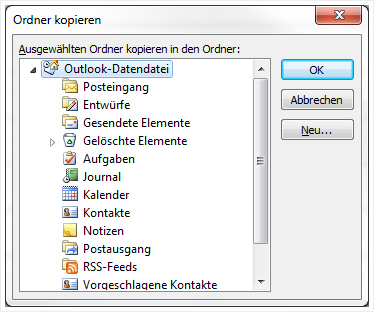
14. Copy folder
Select Outlook data file, the very first entry in the list, as the storage location for the copy and then click on OK.
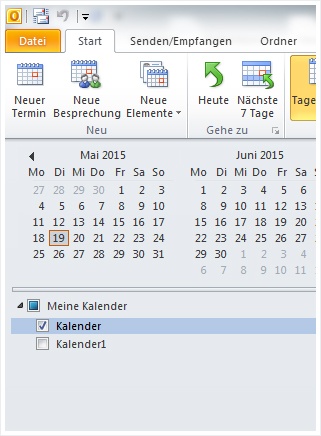
15. Copied calendar
The copied calendar should now be visible with the same name (appended with 1) at the same location as the original. The copy is not required for the synchronisation; it serves purely as a back-up in case problems arise during the set-up.
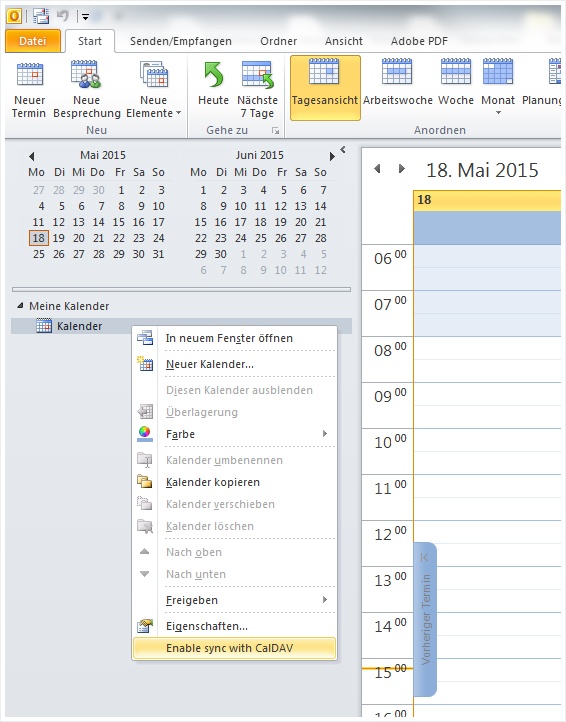
16. Synchronise calendar
Now right-click on the calendar that you wish to synchronise and select the menu item Enable Sync with CalDAV at the very bottom.
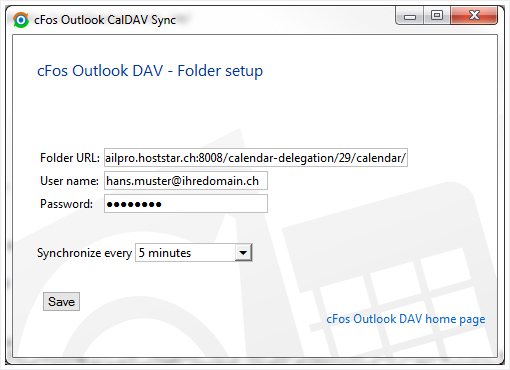
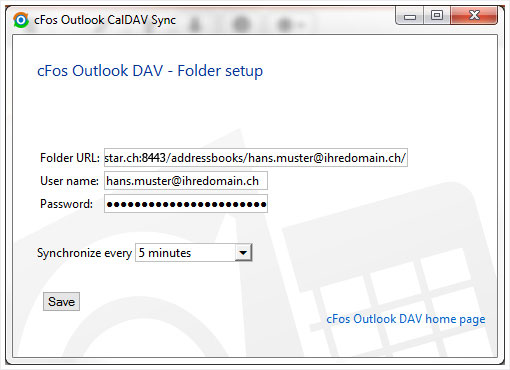
17. cFos Outlook DAV
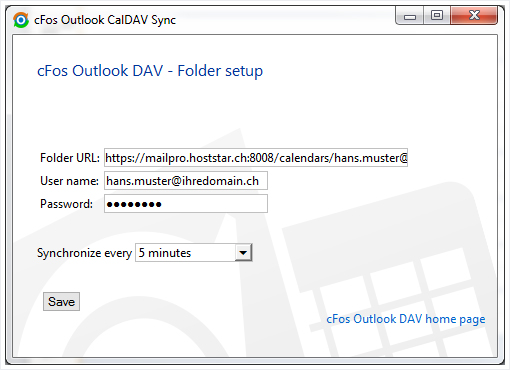
You now need the calendar URL that you previously copied from Webmail. Set the calendar URL under Folder URL. For User name, enter the email address that you entered for the mail configuration of Outlook. For Password, enter the password that corresponds to the email address.
Synchronize every determines how often (and whether) synchronisation should be carried out automatically. With the Manual sync only option, synchronisation only occurs when you click on the Sync All button. With Sync disabled on the other hand, the calendar will no longer be synchronised.
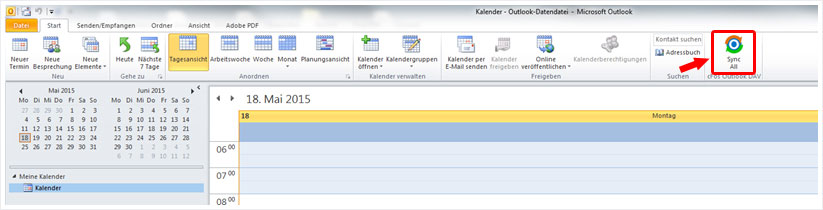
18. Sync All
If the data is correct and the synchronisation interval is set to the desired value, click on the Save button and then close the Folder setup window. You can then test the synchronisation straight away by clicking on the Sync All button. In the Start tab, the button should be on the right-hand side.
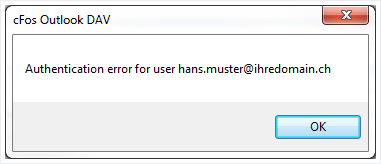
19. First synchronisation
If calendar entries have already been made in Webmail and the synchronisation works, you should see entries in your Outlook calendar within a few minutes. If a new window appears with an alert, there is a problem. In this case please report the error message to support@hoststar.at.
20. Integrating another calendar with a different owner
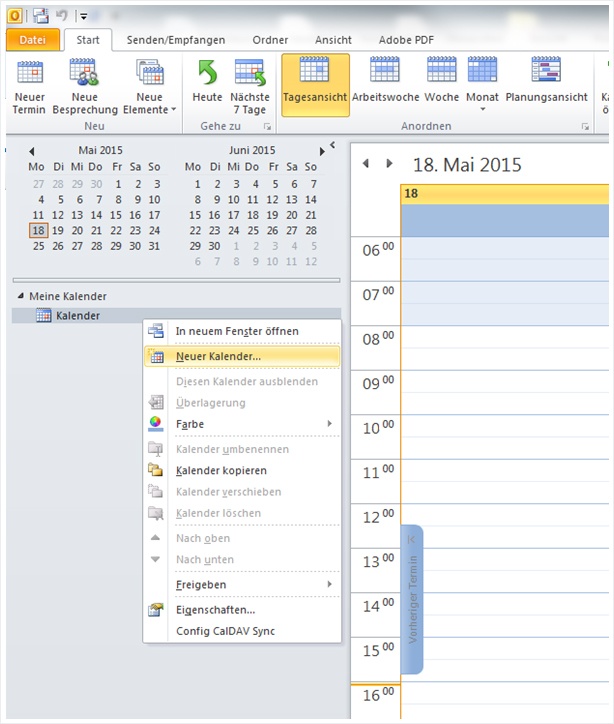
To integrate someone else’s calendar, the necessary permissions must first be set in Webmail to allow you access (read and/or write permissions) to the calendar in question. For setting up in Webmail, please refer to the Instructions for groupware functions in My Panel.
For setting up in Outlook, first create a new, empty calendar, by right-clicking on an existing calendar and then selecting New calendar….
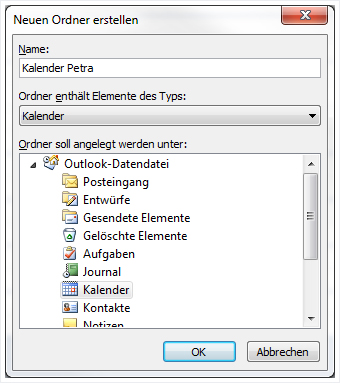
21. Name the calendar
You can give the calendar any name you wish – for obvious reasons, it is preferable for the name to indicate the person whose calendar is connected.
22. Get the calendar URL
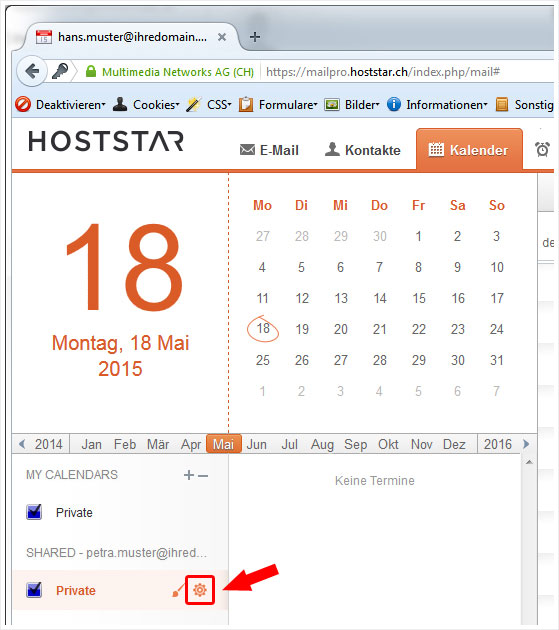
Now you need the calendar URL from Webmail. As described before, these instructions assume that you have already established a link to another calendar via Webmail. Underneath your own calendar, you should see other calendars displayed as SHARED – xyz@domain.com.
Select the calendar you wish to access via Outlook and then click on the cog icon.
23. Copy the calendar URL
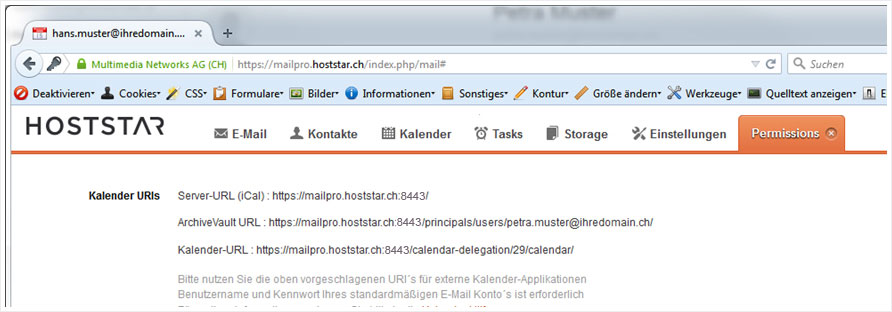
Because this is a shared calendar, the calendar URL will look different in this case. You can ignore the first two calendar URLs.
Only copy the address denoted as Calendar URL once again to the configuration of the Outlook plug-in.
Without SSL: http://mailpro.hoststar.at:8008/calendar-delegation/29/calendar/
With SSL: https://mailpro.hoststar.at:8443/calendar-delegation/29/calendar/
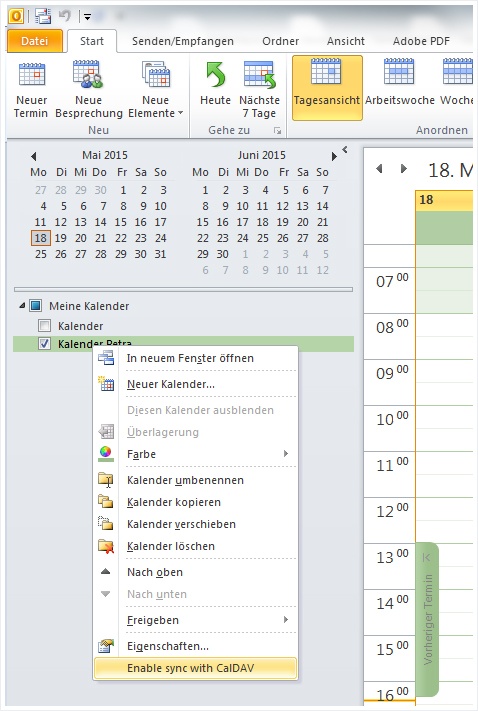
24. Activate synchronisation
Right-click on the newly established, empty calendar and select Enable sync with CalDAV.
25. Add the calendar URL
Add the previously copied calendar URL under Folder URL. Fill in User name and Password, on the other hand, with the login details from your own email address. Even when you access someone else’s calendar, you will only ever need your own login details.
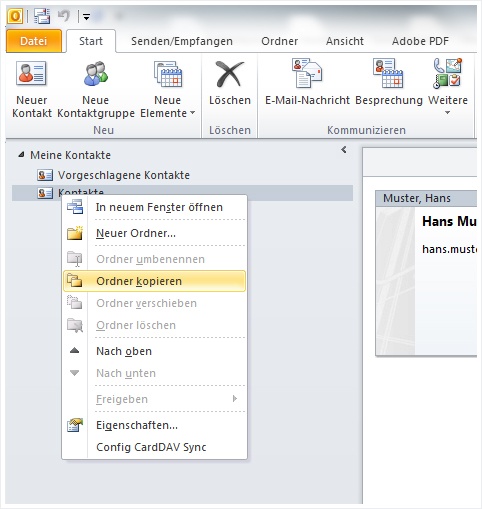
26. Create backup of previous contacts
Before setting up the synchronisation of contacts, you should also create a backup of existing data. To do this, right-click on your Contacts folder and select Copy folder.
27. Define storage location for the backup.
Select Outlook data file, the very first entry in the list, as the storage location for the copy and then click on OK.

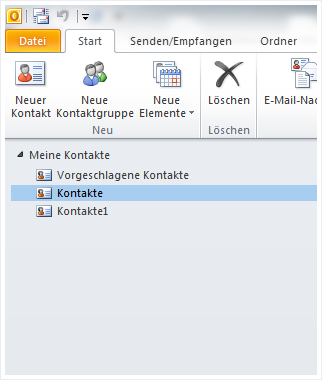
28. Check backup
The copied Contacts folder should now be visible with the same name (appended with 1) at the same location as the original. The copy is not required for the synchronisation, it serves purely as a back-up in case problems arise during the set-up.
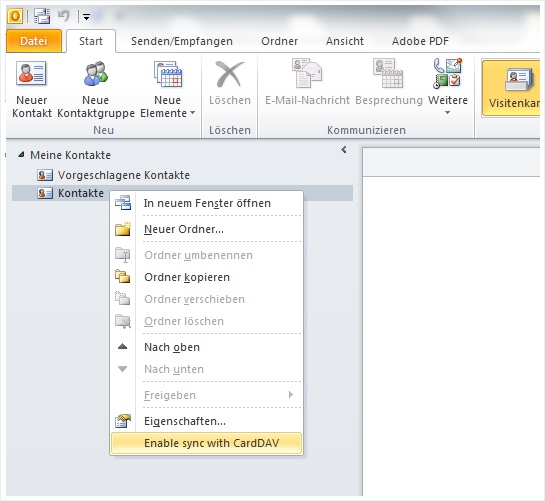
29. Activate synchronisation
Right-click on the contacts folder you wish to synchronise and select Enable sync with CardDAV.
30. Compose contacts URL
The URL for accessing contacts is unfortunately not directly visible in Webmail, but is composed as follows:
With SSL: https://mailpro.hoststar.at:8443/addressbooks/email-address/
Without SSL: http://mailpro.hoststar.at:8008/addressbooks/email-address/
Replace the email address shown in grey with your own and enter the resulting URL in Folder URL. Input the login details from your own email address into the User name and Password fields.
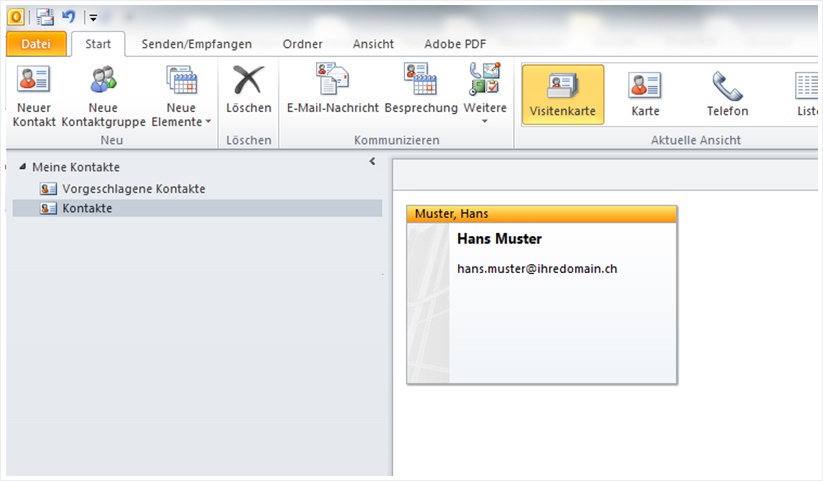
31. Synchronise contacts
A subsequent test with the Sync All button should result in at least one new contact appearing, because your own email address is automatically included in the address book as soon as a MailPro account is created. If this test runs successfully, the set up of contact and calendar synchronisation in Outlook is complete.