Windows Phone – Set up & synchronisation
To get the most out of MailPro push emails, calendar, contacts and tasks synchronisation on your Windows Phone, you can configure them as follows:
1. Open the software
Open Settings on your Windows Phone. You can find this in the main menu.
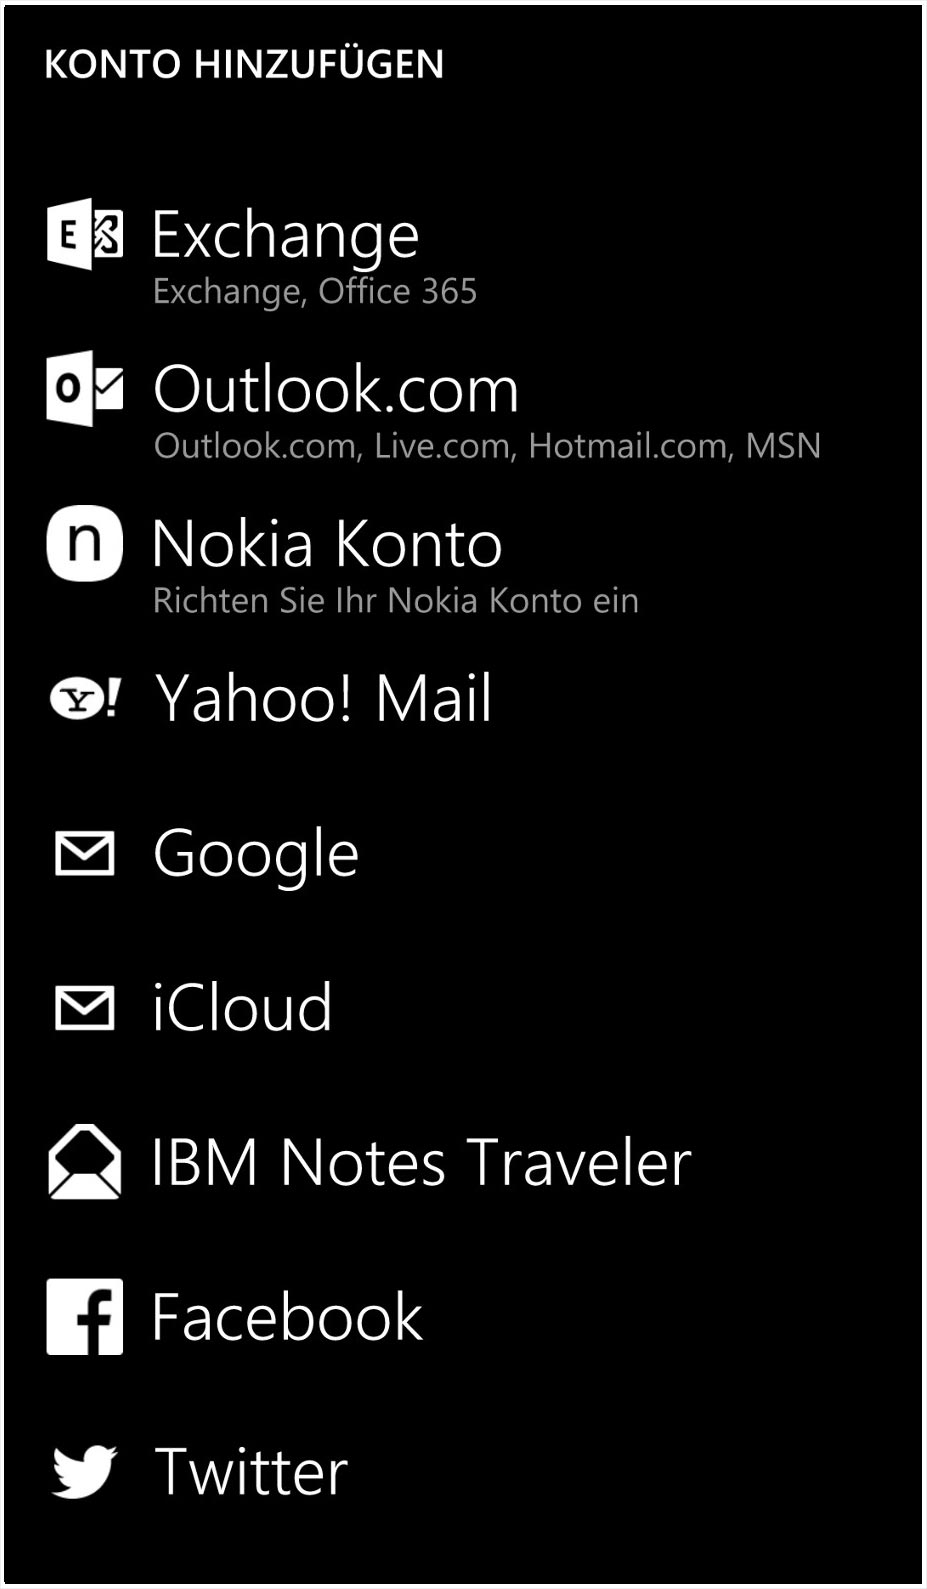
Select the item Email accounts & other.
Here you will find the Add account menu item – select it.

2. Account type «Exchange»
In the account type selection, choose Exchange to ensure you can use the full range of MailPro account functions.
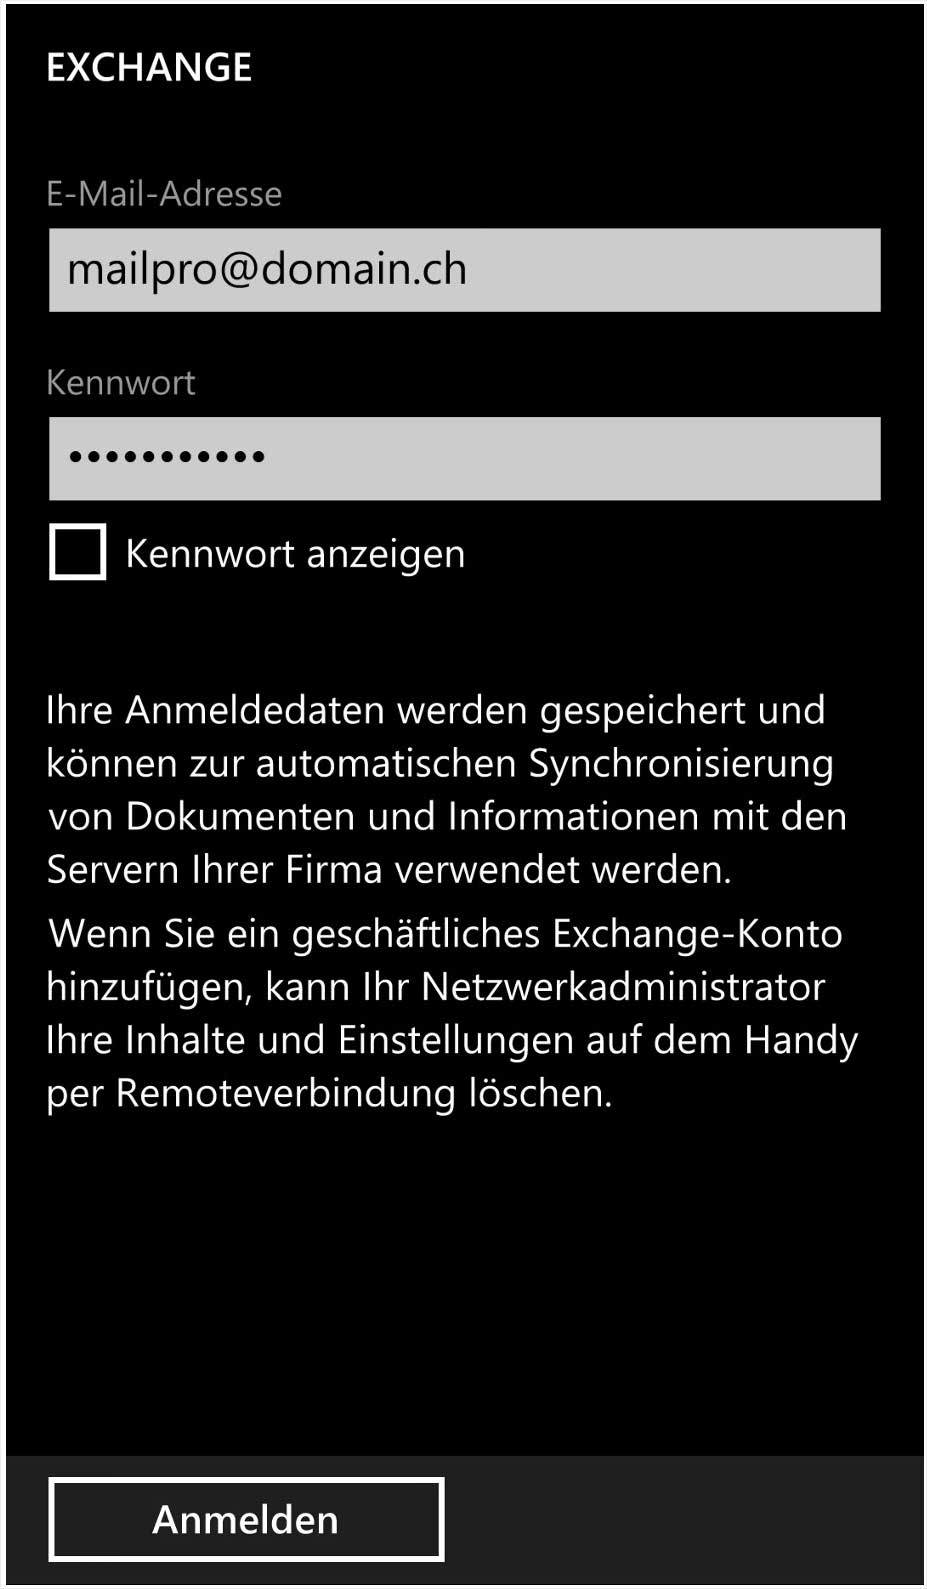
3. Enter login details
Enter the required values.
Email address: Enter the email address you wish to configure. If you are unsure whether the address has already been set up on the server, refer to the MailPro configuration in My Panel.
Password: The password you selected for the MailPro email address in My Panel. If you do not know the password, refer to the instructions for changing/deleting address.
Then click Login.
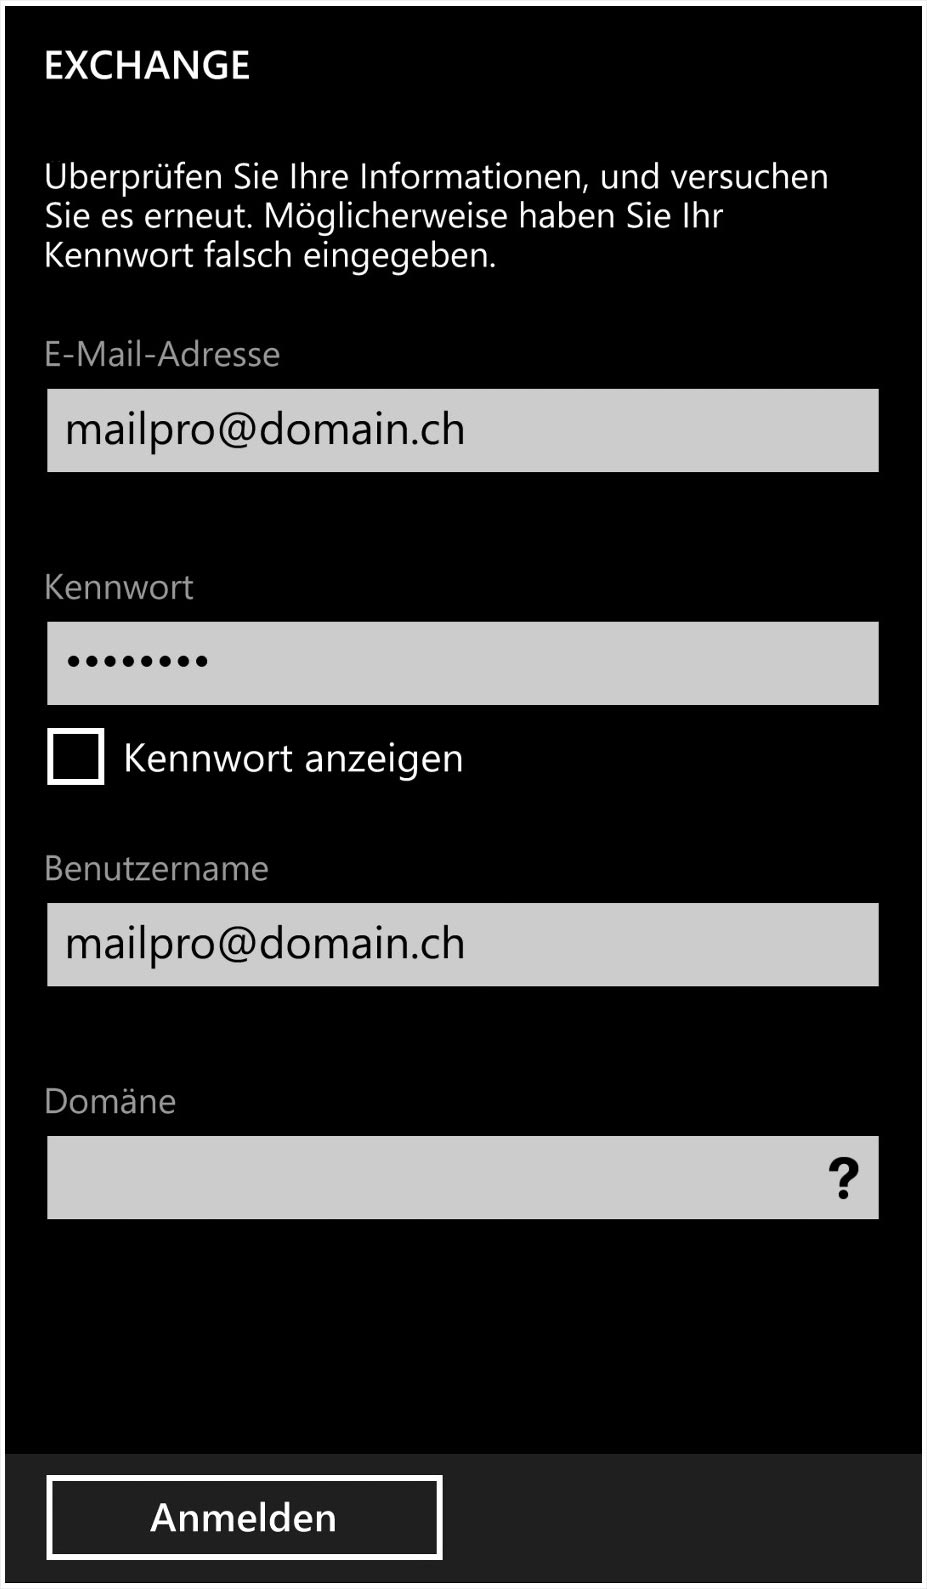
4. Enter user name
Your Windows Phone will now attempt to retrieve the required MailPro settings itself. However, for the configuration of MailPro further manual entries are required.
Under User name enter your MailPro email address once again.
You can leave the entries for Email address and Password as they are. You can leave the Domain field empty.
Then click Login.
5. Retrieve advanced settings
Your Windows Phone will again attempt to retrieve the required MailPro settings using the user name.
However, further manual entries are required for MailPro. To make these entries, select Advanced.
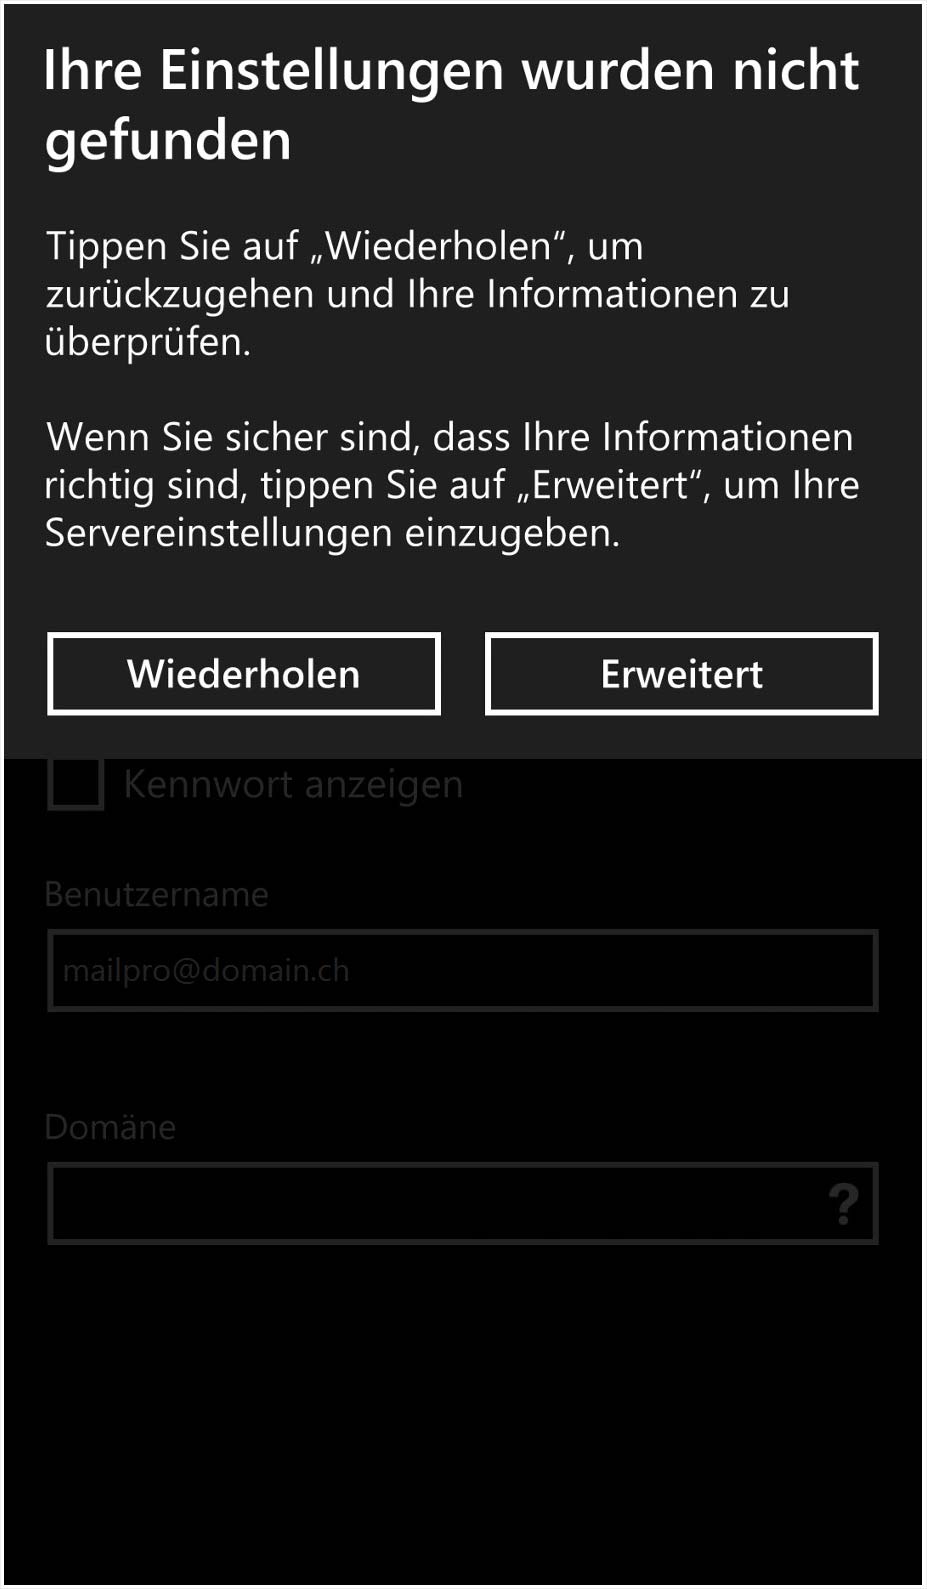
6. Enter advanced settings
You now have the option of entering the advanced settings in order to establish a connection with the MailPro server.
You can leave the values Email address, Password and User name as they are if you entered them correctly in the previous steps.
You can leave the Domain field empty.
Under Server enter this value: mailpro.hoststar.at
Select Login to test the MailPro email address on your Windows Phone and to complete the set-up.

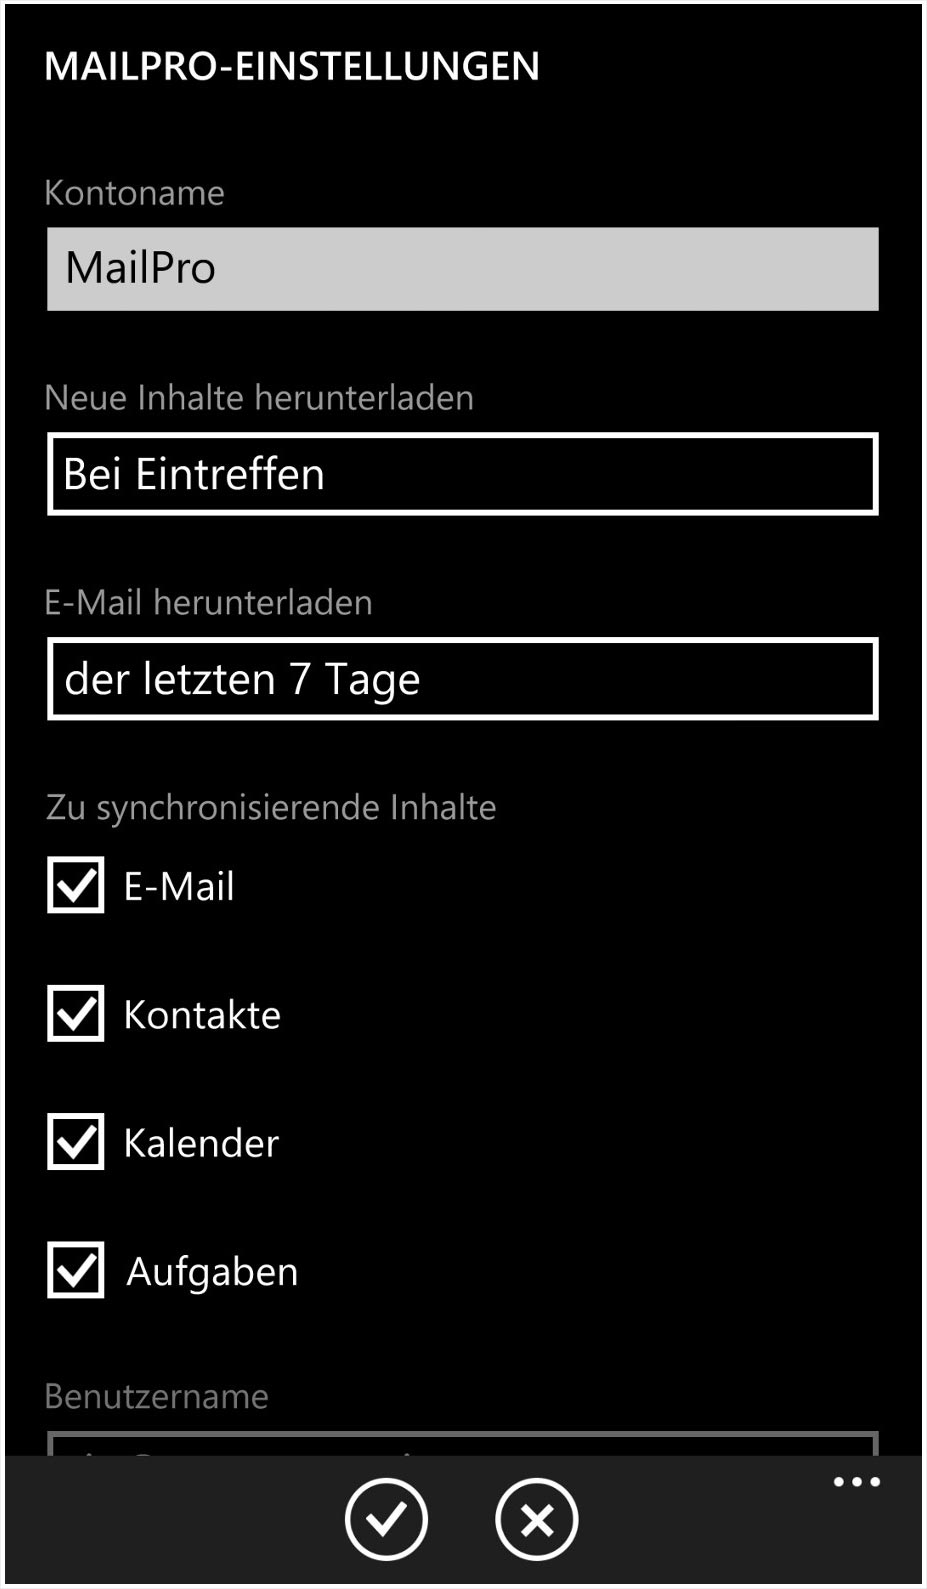
7. Edit email account
If you would like to adjust the settings of your MailPro account on your Windows Phone, select the account you have just created in Settings under Email accounts.
Here, you have the option of defining an Account name of your choosing.
For Download new content it is a good idea to enter On arrival. This means that you receive new emails immediately on your Windows Phone.
For Download emails you can define how many days’ worth of emails should be downloaded onto your Windows Phone from the MailPro server.
Define Content to synchronise. With MailPro, emails, contacts, calendar and tasks are synchronised as standard.